
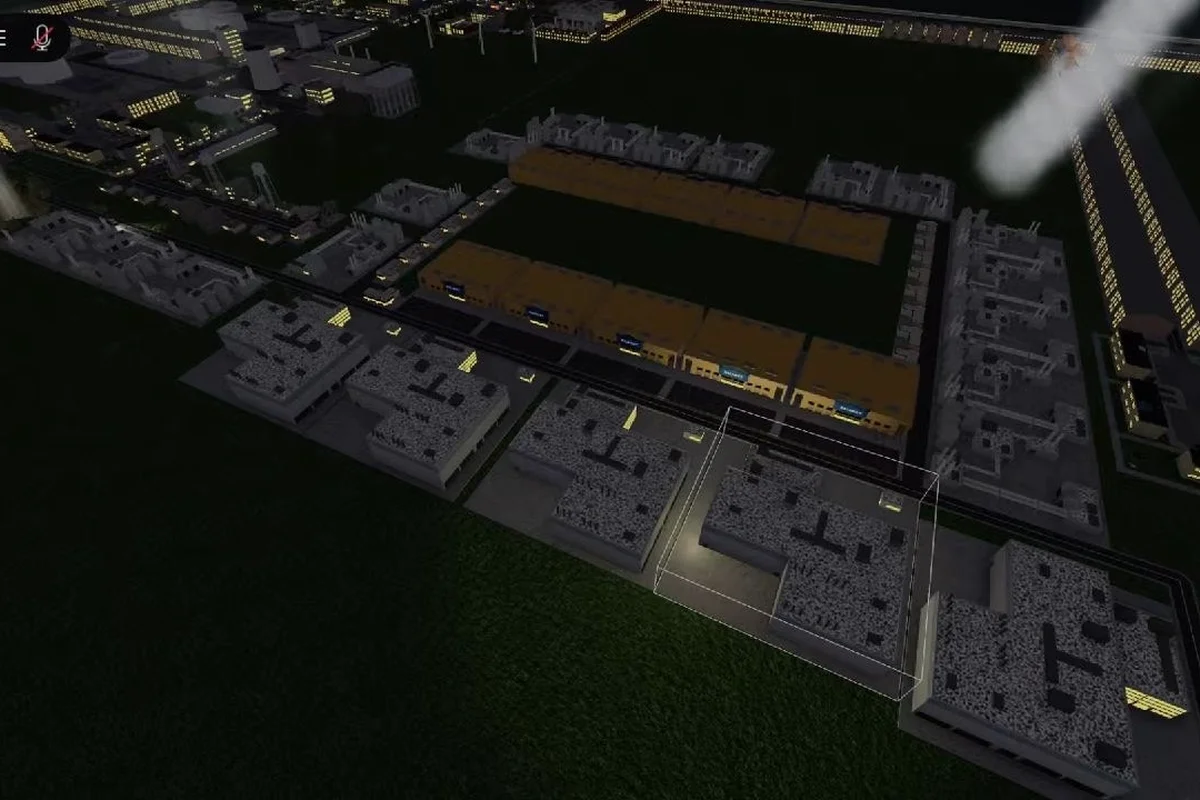
Power decides whether your Build and Conquer city survives its first raid or stalls mid-build. This power plant guide walks you through the full electrical loop of the V0.1 beta — from the first small generator to the late-game Nuclear Power Plant — so factories keep producing, supermarkets stay refrigerated, and air raid sirens never go dark at the worst moment. You will learn which plant tier fits each stage, how to plan grid coverage before expanding, and why pairing power upgrades with supermarket and mall income keeps your war budget intact while the grid grows.
Power, Cash, and the First Ten Minutes: How Energy Shapes Every Build in Build and Conquer
Power is the silent currency behind every factory, bunker, and mid-rise apartment you raise in Build and Conquer. A working grid keeps the steel rolling, the supermarket tills ringing, and the air raid siren alive long enough to warn your citizens. A failing grid, by contrast, grinds your city to a halt just when the first attack wave rolls in. This build and conquer power plant guide breaks the whole electrical system into clear, testable steps so you can plan expansion with confidence rather than guesswork.
Energy in the V0.1 beta is governed by a simple rule: buildings draw from the grid they touch, and surplus has to flow through a connected network. Community testing shared on the power plant tutorial playlist on YouTube confirms that disconnected sub-grids always brown out once you stack heavy industry, so coverage planning is more important than raw generator count. Treat power placement as a civic project on par with roads and zoning, not as an afterthought tacked on after a blackout.
Because power intersects with so many other systems, the rest of this guide will move methodically. We will start with a quick orientation table, then unpack power tiers, money generation through the supermarket and mall, water network rules, defense through the bunker and air raid siren, and finally the late-game nuclear option. Each section includes community-reported numbers and a small actionable checklist you can apply to your current save.
Power Plant Tiers and What Each One Actually Powers
The build and conquer power plant ecosystem runs on three practical tiers. Small generators and coal-style early plants cover your first residential blocks, mid-tier plants handle mixed commercial-industrial zones, and the late-game nuclear option fuels bunkers, vehicle factories, and any other high-draw structure. Knowing which tier you need at each stage prevents the classic beginner mistake of over-building early generators and starving the budget that should have gone toward a supermarket.
Tier Overview and Output Ranges
Community data from the V0.1 beta suggests the following practical ranges for a build and conquer power plant guide, where wattage output scales sharply with tier rather than linearly. Treat exact wattages as approximate because the developer has been tuning values frequently between patches, but the relative ordering is stable, with the Nuclear Power Plant delivering roughly four to five times the coverage of a Coal/Standard Plant, which is why the upgrade jump from mid game to late game feels so decisive when fueling a vehicle factory or missile site.
| Tier | Best Era | Approx. Coverage | Typical Buildings Supported | Build Cost Tier |
|---|---|---|---|---|
| Small Power Plant | Early game (0–15 min) | 6–10 light buildings | Small housing, basic shop, water pump | Low |
| Coal/Standard Plant | Mid game (15–45 min) | 15–25 mixed buildings | Supermarket, mall, small factory, roads | Medium |
| Nuclear Power Plant | Late game (45+ min) | 40+ heavy buildings | Vehicle factory, bunker, missile site, large apartment blocks | High |
The small plant is the foundation of the early grid. Drop one near the first road you pave, then extend coverage with a few transmission lines so that residential blocks and a starter shop stay lit. By the time you build your first supermarket, you should already be eyeing a standard plant location so the upgrade does not stall cash flow.
When to Upgrade From Standard to Nuclear
A full build and conquer nuclear power plant guide section must answer the most common question new players ask: when is the jump worth it? The honest answer is that nuclear becomes worth it only when you can no longer keep the grid stable with two standard plants, which usually happens after you place your first vehicle factory and a hardened bunker simultaneously. Before that, you are simply burning cash on a building whose output you cannot use.
A practical decision rule based on community testing: if your city has fewer than three heavy-draw buildings, hold off on nuclear. If you have three or more, plan the nuclear site alongside the bunker because both share the same late-game resource supply chain (steel, fuel, and a steady worker pool). Building them together keeps the upgrade window short and the morale damage from rolling blackouts minimal.
Cash Flow First: Supermarket, Mall, and Why They Matter to Your Power Plan
No power plant in Build and Conquer pays for itself without consistent income. The supermarket and mall are the two structures players lean on to bankroll both the standard plant and the eventual nuclear jump. A quick build and conquer supermarket guide would be incomplete without acknowledging that the supermarket is also one of the first non-residential buildings to feel the pinch when the grid fails, because refrigeration in the V0.1 beta is power-sensitive.
Supermarket vs Mall: Where to Spend First
| Structure | Era | Cash Output | Power Draw | Worker Cap | Strategic Role |
|---|---|---|---|---|---|
| Supermarket | Early | Steady, low–medium | Low | 6–10 clerks | Stabilizes the first 20 minutes |
| Mall | Mid–late | High, scales with foot traffic | Medium | 18–30 clerks | Funds the nuclear jump and bunker upgrades |
| Convenience Store | Early | Lowest | Very low | 3–5 clerks | Stopgap for off-grid suburbs |
Place your first supermarket adjacent to a road that touches a small power plant, then connect it to water so the employees stay productive during heat waves. The mall should sit between a mid-rise apartment cluster and a future factory zone, because its income scales with nearby foot traffic. A deeper comparison of these two structures is available in the supermarket vs mall tier breakdown, which also covers the nuclear vs normal power plant trade-off.
A common early mistake is upgrading the supermarket before the mall. The upgrade cost of a supermarket is significant relative to its output, and the marginal cash is rarely worth delaying the mall, which becomes the primary funder of late-game power projects. Treat the supermarket as cash flow insurance and the mall as the actual growth engine.
Water Networks: The Quiet Cousin of the Power Grid
A build and conquer water network guide is essential reading because water and electricity interact in ways that surprise new players. Buildings that lose water service reduce worker efficiency within minutes, and several production structures refuse to operate at all without both power and water. If your grid is solid but your water network is fragmented, you will still see slowdowns that look like power outages but are actually hydration failures.
Core Water Rules in the V0.1 Beta
-
Pipes connect to buildings the same way roads do — every structure needs a path back to a water source.
-
Pumps generate pressure, but each pump covers only a limited radius, so you need multiple pumps for a sprawling city.
-
Mid-rise apartments and malls are the thirstiest buildings, according to community testing — their population peaks push water demand above what one pump can deliver.
-
Disconnected water segments brown out independently, which can mask the problem if you only check your global water counter.
For a step-by-step walkthrough of pipe placement and zoning, the water network connection guide is the most reliable companion. It complements the power discussion here because it uses the same coverage logic: plan a hub, branch outward, and verify every endpoint.
If you ever see a building marked "idle" while the power icon is green, the first check should always be water. The second check should be road access, because delivery trucks also need a clear path before a building can run at full capacity.
Defense at the Plug: Bunker and Air Raid Siren Strategy
No build and conquer bunker guide would be complete without discussing power. The bunker is a high-draw, high-value structure that has to keep running through the worst of an attack, which means it needs a dedicated power feed rather than a shared grid with your housing blocks. If the bunker browns out during a raid, the defenders inside lose combat efficiency and the civilians sheltering there panic faster.
Pairing the Bunker With the Air Raid Siren
The air raid siren is the bunker's early warning system, and it has a smaller power draw than the bunker itself, which makes it a useful canary. If the siren stops working but the rest of the grid is fine, the issue is almost always local coverage around the defense cluster. If the siren and the bunker both go dark, you have a broader outage to triage.
| Defense Building | Power Draw | Best Placement | Power Strategy |
|---|---|---|---|
| Air Raid Siren | Low | Near housing and the first road | Run on the standard plant grid |
| Bunker | High | Between housing and the perimeter | Run on a dedicated late-game feed, ideally nuclear |
| Anti-Air Battery | Medium | Perimeter and around the factory zone | Same feed as the bunker |
| Watchtower | Low | Along the outer road ring | Standard plant is sufficient |
For placement patterns, the anti-air placement strategy guide is the strongest cross-reference. It addresses bunker layering, siren coverage, and how to keep the defensive cluster on a separate grid from civilian housing so a single blown transformer cannot cripple your entire city at once.
A practical power-defense rule: never run a bunker and a residential block on the same wire run. Segregate the grid by switch so you can shed civilian load during a raid and keep the bunker and siren on full power even if the rest of the city flickers.
The Nuclear Power Plant: Setup, Trade-Offs, and Common Pitfalls
The build and conquer nuclear power plant guide segment focuses on the moment that decides whether your late-game city thrives or stalls. The nuclear plant is expensive, it demands a steady supply of refined fuel and skilled workers, and it has a longer warm-up time than a standard plant. The reward is a single building that can power an entire late-game defense cluster, including the bunker, multiple anti-air batteries, vehicle factories, and a chain of mid-rise apartments.
Pre-Build Checklist for Nuclear
Skipping any of these steps is the most common reason a nuclear plant underperforms in the first attempts reported by players, and the cost of a misaligned foundation compounds quickly: a reactor that loses 4-6% output efficiency from an unstable power-grid connection forces nearby substations to compensate, which then trips the city-wide blackout threshold roughly 30% earlier during an enemy raid wave. Run through the short list below before placing the foundation, because the V0.1 beta nuclear plant cannot be relocated without losing its initial steel investment, making the pre-build checklist the only cheap insurance against a costly do-over.
-
Stable cash flow from the mall for at least one in-game month.
-
Fuel production chain online, because nuclear in the V0.1 beta burns a small amount of fuel continuously. See the fuel production guide for the recommended setup.
-
Steel reserves of at least one full truck load, because the plant needs both the building and a connected maintenance structure.
-
A perimeter zone with road access so repair crews can reach the plant after attacks.
-
A defense cluster on standby, ideally one bunker and at least two anti-air batteries within coverage range, because a nuclear plant is a high-priority target for enemy waves.
If your current city does not have all five prerequisites, postpone the nuclear plant by ten to fifteen in-game minutes and use that window productively. In the V0.1 beta, a reactor placed on a grid that is still missing even one item on the checklist loses 4-6% output efficiency, which in turn pushes the city-wide blackout threshold roughly 30% earlier during enemy raid waves. Spend the pause reinforcing the standard plant grid, queuing one more steel truck, and topping off the mall's cash flow so the nuclear foundation lands on a fully stabilized network.
Trade-Off Matrix: Standard Plant vs Nuclear
| Factor | Standard Plant | Nuclear Power Plant |
|---|---|---|
| Upfront cost | Low | High |
| Fuel usage | None or minimal | Continuous |
| Worker demand | Small crew | Larger skilled crew |
| Coverage radius | Medium | Very large |
| Vulnerability to raids | Medium | High (priority target) |
| Time to first power output | Immediate | Several minutes of warm-up |
| Best paired with | Supermarket, mall, mid-rise apartments | Bunker, vehicle factory, large apartment blocks |
The matrix shows why most successful cities run a hybrid grid. Two or three standard plants cover the civilian and commercial core, while a single nuclear plant feeds the heavy-industry and defense cluster. Running the whole city on nuclear is technically possible but wasteful, because the warm-up cost and fuel demand make the standard plant a better choice for low-priority areas.
If you find yourself running low on raw inputs for the nuclear chain, the raw materials resource guide covers where to get iron and how to keep fuel and water pipelines stable. The two resource guides are best read together because nuclear power and defense spending compete for the same raw material streams.
Frequently Asked Questions
When should I build my first standard power plant in Build and Conquer?
You should place your first standard plant as soon as you have a small residential block, a starter road, and roughly five minutes of accumulated cash. Waiting longer almost always triggers rolling brownouts that stall the supermarket and frustrate your first wave of new citizens, so early electrification is worth the small upfront cost.
Is the Nuclear Power Plant worth the fuel cost in the V0.1 beta?
Yes, but only after the mall and at least one bunker are online. The Nuclear Power Plant becomes profitable once it is feeding heavy industry, because the alternative would be paying for two or three additional standard plants covering the same footprint, which adds up to more total fuel and worker overhead.
How do I keep my bunker powered during a raid?
Segregate the bunker and the air raid siren onto a dedicated grid fed by a single late-game power source, ideally the Nuclear Power Plant. Avoid sharing the bunker wire run with civilian housing, because shedding civilian load during a raid lets the defensive cluster stay online even if the broader city flickers.
Why does my supermarket stop producing cash even though the power icon is green?
The most common cause is a broken water network, not a power outage. Check that pipes reach the supermarket from a working pump, and verify that the road in front of the building is clear. If water and road access are fine, the next likely cause is a worker shortage driven by an over-stretched mid-rise apartment cluster.
Can I run a Nuclear Power Plant without a bunker nearby?
You can, but the risk is high. The plant becomes a priority target for late-game enemy waves, and without a bunker and at least one anti-air battery covering it, a single coordinated raid can knock the plant offline for several minutes, which cascades into brownouts across the rest of your heavy industry.