
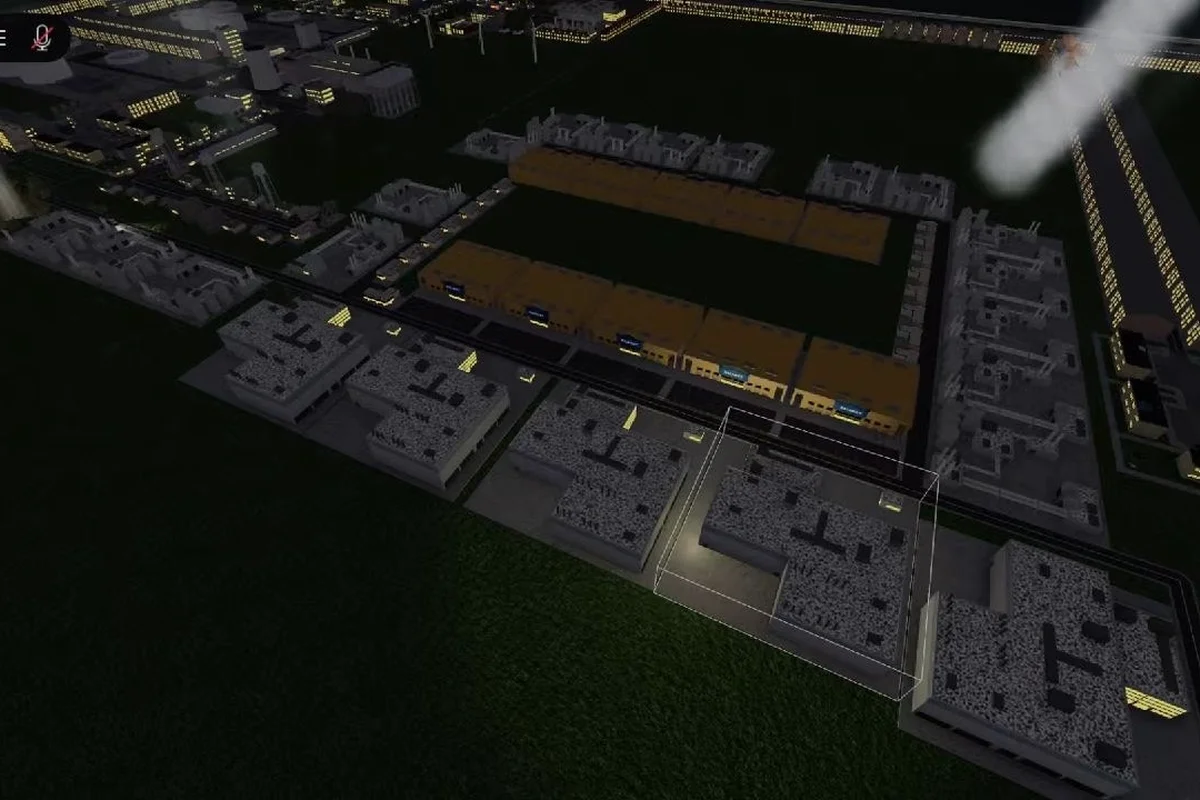
Population is the engine that drives every other system in Build and Conquer, and your choice of housing buildings determines how quickly you can unlock commercial zones, industrial production, and military defenses. The mid-rise apartment stands out as the most efficient early residential option because it delivers roughly 32 population in its base form and scales up to 48 when upgraded, which means fewer plots consumed per citizen housed. Understanding how residential density interacts with road placement and city layout design separates cities that stall at 80 population from those that cruise past the 250-population milestone without wasting a single tile. Once your layout is locked in, the next bottleneck is making sure the right structures come online at the right time—our breakdown of Build And Conquer How To Unlock Buildings walks through the unlock order and prerequisites so your dense districts aren’t waiting on missing services.
How Build and Conquer Housing Buildings Drive Early Expansion
The first twenty minutes of a fresh city hinge on one decision: how many residential buildings you place before your first commercial building. Housing buildings in Build and Conquer do not generate income directly, but they unlock the population thresholds that gate every other structure in the build order. A city with 32 population can support a small commercial strip, while a city stuck at 24 population cannot place a supermarket without first adding another housing unit.
Community data from the V0.1 beta, verified as of 2026-10-11, points to the mid-rise apartment as the workhorse of early residential planning. Players report that a single mid-rise apartment grants roughly 32 population in its base state, and upgrading the structure pushes that figure to 48. The upgrade path matters because it lets you grow population without consuming additional road frontage, which is a scarce resource in tight grid layouts.
The relationship between housing and commercial buildings follows a predictable rhythm. You place housing to raise the population cap, then you place commercial buildings to convert that population into income, then you reinvest that income into more housing. Breaking this rhythm by overbuilding commercial zones too early leaves you with empty storefronts and a stalled population curve.
| Housing Strategy | Population Output | Tile Efficiency | Best Use Case |
|---|---|---|---|
| Mid-rise Apartment (base) | ~32 population | High | Early game core housing |
| Mid-rise Apartment (upgraded) | ~48 population | Very High | Mid-game density boost |
| Suburban Houses | Lower per-tile output | Low | Aesthetic or low-cost starts |
| Mixed Residential Blocks | Variable | Medium | Transitional layouts |
The table above reflects community-reported values from the V0.1 beta, and individual numbers may shift as the developer tunes balance patches. What remains consistent across reports is that the mid-rise apartment outperforms lower-density options when road frontage is limited, because its compact footprint lets you pack more population into the same street length.
Build and Conquer Road Placement for Residential Blocks
Road placement is the invisible infrastructure that determines whether your housing buildings actually function at full capacity. Every residential structure in Build and Conquer needs road access to connect to the city network, and poorly planned roads force you to demolish and rebuild housing later, which wastes both time and construction resources. The core principle is simple: plan your road grid before you place your first apartment, not after.
A common early mistake is building a single long road with housing on only one side. This layout consumes road tiles inefficiently because each road segment only services one row of buildings. The better approach is to run roads in parallel with housing on both sides, which doubles the number of residential plots served per road tile. This is especially important when you are working toward the 250-population milestone, because every wasted road tile represents a housing plot you cannot place.
| Road Layout Pattern | Housing Served per Road Tile | Flexibility | Recommended Phase |
|---|---|---|---|
| Single-sided strip | 1 building | Low | Never recommended |
| Double-sided avenue | 2 buildings | Medium | Early to mid game |
| Grid with service alleys | 2-4 buildings | High | Mid to late game |
| Cul-de-sac clusters | 1-2 buildings | Low | Aesthetic builds only |
The grid pattern with service alleys deserves special attention because it solves a problem that emerges around 150 population. As your city grows, you will need space for power lines, water infrastructure, and later military buildings, and a tight grid leaves no room for these support structures. Leaving a one-tile alley between every second row of housing creates natural corridors for utilities without sacrificing residential density.
Players who master road placement early report that they rarely need to demolish housing buildings later, because their initial grid already accommodates the full build and conquer city layout design they planned from the start. The cost of demolition in the V0.1 beta is not trivial, so avoiding rebuilds is a meaningful economic advantage.
Build and Conquer Commercial Buildings That Fund Housing Growth
Commercial buildings are the financial engine that pays for your residential expansion, and understanding which commercial structures generate reliable income is just as important as knowing which housing buildings to place. The supermarket and mall are the two most commonly cited money makers in community reports, and both serve different phases of city development.
The supermarket is the early-game workhorse because it requires a relatively low population threshold to unlock and generates steady income from a compact footprint. The mall, by contrast, produces more income per tile but demands a higher population base before it becomes profitable, which means placing a mall too early actually slows your housing expansion by tying up capital in an underperforming asset.
| Commercial Building | Income Reliability | Population Requirement | Synergy with Housing |
|---|---|---|---|
| Supermarket | High | Low | Funds early apartment upgrades |
| Mall | Very High | High | Funds late-game density projects |
| Small Shop | Medium | Very Low | Fills gaps in mixed-use blocks |
| Market Stall | Low | Very Low | Temporary income before upgrades |
The synergy column in the table above is the key insight. A supermarket placed adjacent to a block of mid-rise apartments creates a self-reinforcing loop: the apartments provide the population that makes the supermarket profitable, and the supermarket provides the income that pays for apartment upgrades. This loop is the fastest path to the 250-population milestone that most players are chasing.
When you plan your build and conquer commercial buildings, think about them as population multipliers rather than standalone income sources. Every commercial structure you place should be justified by the housing it will fund, not just the income it generates in isolation. This framing keeps your city balanced and prevents the overbuilding trap that stalls so many early cities.
Build and Conquer Industrial Buildings and the Population Threshold
Industrial buildings introduce a different set of constraints that interact with your housing strategy in subtle ways. The factory is the primary industrial production building in the V0.1 beta, and it feeds steel and vehicle output that become important in the mid to late game. However, industrial buildings consume significant space and often require dedicated road access, which means they compete directly with residential plots for prime real estate.
The nuclear power plant represents the late-tier energy solution for heavy industry, but it demands a substantial population base before it becomes viable. This creates a chicken-and-egg problem: you need industrial output to support a large population, but you need a large population to support industrial infrastructure. The solution is to phase your industrial expansion carefully, adding factories only after your housing stock is stable and your commercial income is flowing.
| Industrial Building | Space Requirement | Population Gate | Impact on Housing Layout |
|---|---|---|---|
| Factory | High | Medium | Requires dedicated industrial zone |
| Nuclear Power Plant | Very High | Very High | Forces late-game layout redesign |
| Workshop | Low | Low | Can integrate into mixed blocks |
| Warehouse | Medium | Medium | Needs road access but no population |
The factory's space requirement is the most common source of mid-game layout failures. Players who pack their residential blocks too tightly discover that they have no room for a factory without demolishing housing, which sets their population back by 30 to 50 citizens. Planning an industrial zone from the start, even if you do not build there immediately, prevents this painful rebuild.
Community reports consistently emphasize that build and conquer industrial buildings should be placed on the periphery of your city, not in the center. This keeps industrial traffic and noise away from residential areas while preserving central tiles for high-density housing and commercial buildings. The periphery placement also makes it easier to expand industrial capacity later without disturbing your established residential grid.
Build and Conquer Building Unlock Order for the 250-Population Push
The unlock order you follow determines whether you hit 250 population in one session or stall at 120 and restart. Based on community testing from the V0.1 beta, the optimal sequence starts with residential buildings, then adds a commercial income source, then returns to residential upgrades before touching industrial production.
The reasoning behind this order is straightforward. Housing buildings unlock the population thresholds that gate everything else, so delaying housing delays every other system. Commercial buildings convert population into income, so they should follow housing immediately. Industrial buildings consume resources and space without directly raising population, so they belong later in the sequence once your residential base is stable.
| Unlock Step | Building Type | Purpose | Population Milestone |
|---|---|---|---|
| 1 | Mid-rise Apartment | Establish population base | 32-48 |
| 2 | Supermarket | Generate income for upgrades | 60-80 |
| 3 | Apartment Upgrade | Boost density without new plots | 96-120 |
| 4 | Factory | Unlock industrial production | 150-180 |
| 5 | Mall | Scale income for late expansion | 200-250 |
The apartment upgrade at step three is the most frequently skipped step in community playthroughs. Players often rush to industrial buildings as soon as they unlock, only to find that their population has stalled because they never upgraded their existing housing. The upgrade path is cheaper than building new apartments and delivers population without consuming additional road frontage, which makes it the highest-value move in the mid-game.
Following this build and conquer building unlock order does not guarantee success, but it eliminates the most common failure modes that players report. The sequence keeps your city balanced at every stage, ensuring that each new building type has the population and income support it needs to function effectively.
Build and Conquer City Layout Design Principles for Housing Density
City layout design is where individual building choices become a coherent strategy. The best layouts treat housing as the primary constraint and design everything else around it, because residential buildings are the most numerous structures in any successful city and the most sensitive to road access and spacing issues.
The service alley concept deserves deeper treatment here because it solves multiple problems simultaneously. By leaving a one-tile gap between every second row of housing, you create space for power lines, water infrastructure, and later military buildings without sacrificing residential density. This gap also improves traffic flow, which matters more as your city grows and road congestion becomes a real constraint on expansion.
| Layout Element | Impact on Housing Density | Common Mistake | Correction |
|---|---|---|---|
| Road spacing | Direct | Too wide or too narrow | Match road gap to building footprint |
| Service alleys | Indirect but critical | No space for utilities | Reserve one tile per two rows |
| Industrial zoning | Moderate | Industrial in center | Move to periphery |
| Commercial placement | Low | Commercial too spread out | Cluster near housing |
The correction column in this table reflects the most common fixes that players apply after their first failed city. Almost every failed layout can be traced to one of these four elements, and almost every successful layout addresses all four from the start. The build and conquer city layout design principles are not complicated, but they require discipline to apply consistently.
Players who internalize these principles report that their second city always outperforms their first, often by a wide margin. The difference is not better buildings or faster construction, but a layout that accommodates growth without requiring demolition. When you plan for the city you will have at 250 population, not the city you have at 50, every building decision becomes easier.
Frequently Asked Questions
What is the best housing building in Build and Conquer?
The mid-rise apartment is the best housing building for most players because it delivers roughly 32 population in its base form and scales to 48 when upgraded. Its compact footprint means you can pack more population into limited road frontage, which is critical for hitting the 250-population milestone efficiently.
How many housing buildings do I need to reach 250 population?
You need roughly six to eight mid-rise apartments to reach 250 population, since each grants 32 population base and up to 48 when upgraded. Pair them with Supermarkets or Malls early to fund construction, and keep residential blocks tight against your road grid so the 250-population threshold unlocks without wasting space.
Should I upgrade housing or build new apartments?
Upgrading existing housing is almost always the better choice in the mid-game because it delivers population without consuming additional road frontage or tiles. New apartments make sense when you have spare road access and need to expand into a new block, but upgrades should be your default move once your initial residential grid is established.
Where should I place industrial buildings relative to housing?
Place industrial buildings on the periphery of your city, not in the center, because they consume significant space and compete with residential plots for prime real estate. This placement keeps industrial traffic away from housing areas while preserving central tiles for high-density residential and commercial development.
What is the fastest way to unlock the 250-population milestone?
The fastest path follows a specific sequence: place mid-rise apartments first, add a supermarket for income, upgrade existing apartments before building new ones, then add a factory and mall once your residential base is stable. Skipping the apartment upgrade step is the most common reason players stall before reaching 250 population.