
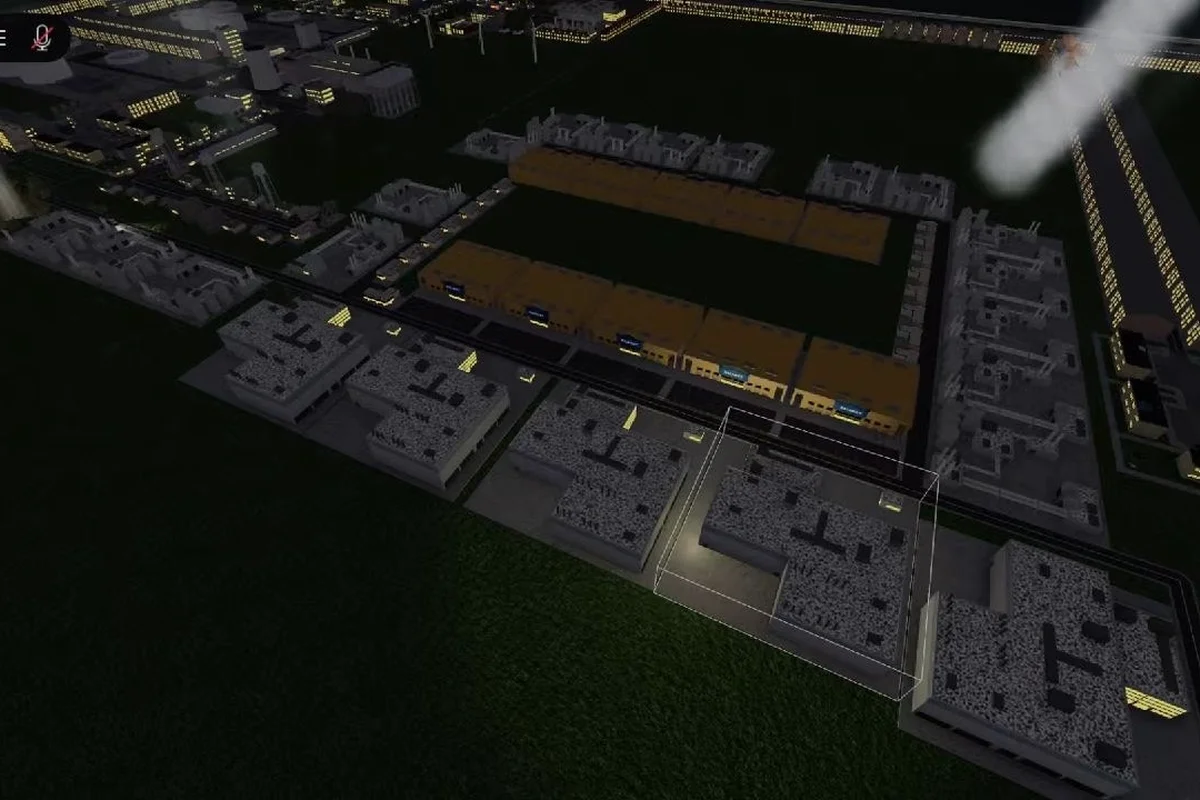
Unlocking new structures in Build and Conquer is the core progression loop that turns a bare plot into a functioning city. The process is not a single button press; it requires you to clear city level gates, manage construction queues, and satisfy tier requirements for each building type. Mastering this system early prevents resource waste and keeps your expansion momentum steady through the mid-game.
Understanding the Building Unlock Framework
The unlock system in Build and Conquer operates on three interlocking layers that every player must navigate. The first layer is your city level, which acts as a global gate for most structures. The second layer is the construction queue, which limits how many projects you can run simultaneously. The third layer is the tier requirement, a per-building condition that often demands specific infrastructure or population thresholds before a structure appears in your build menu.
Community reports from the V0.1 beta indicate that players frequently stall because they focus on one layer while ignoring the other two. A player might grind city levels but forget to expand building capacity, leaving them unable to place the newly unlocked structure. Another common failure is starting a long construction project that blocks the queue, preventing a critical unlock from completing on time. Understanding how these layers interact is the foundation of efficient progression.
The official Roblox game page for Build and Conquer confirms the game launched as a V0.1 beta in August 2026, which means some unlock values are still being tuned. Treat every numeric threshold you see in community guides as a snapshot, not a permanent rule. The developer, The Slop Company, has adjusted progression pacing multiple times during the beta period.
City Level Gates and Their Impact
City levels are the primary unlock mechanism for most buildings in Build and Conquer. Each level increase expands your build menu with new residential, commercial, and industrial options. The exact level requirements vary by building tier, but the pattern is consistent: early structures unlock at levels 1 through 5, mid-tier buildings appear between levels 6 and 12, and late-tier options like the Nuclear Power Plant require significant level investment.
The table below summarizes the general unlock progression based on verified community data from October 2026:
| Building Tier | Typical City Level Range | Example Structures | Primary Requirement |
|---|---|---|---|
| Early | 1-5 | Basic houses, small shops | City level only |
| Mid | 6-12 | Factory, Mid-rise Apartment | City level + population |
| Late | 13+ | Nuclear Power Plant, Bunker | City level + infrastructure |
| Civil Defense | Varies | Air Raid Siren | City level + threat level |
The Mid-rise Apartment is a particularly important mid-tier unlock because it provides roughly 32 population at base level, scaling up to 48 population when fully upgraded. This population jump often unlocks the next tier of buildings, creating a positive feedback loop that rewards players who prioritize housing early.
Construction Queue Mechanics
The construction queue is the pacing mechanism that prevents players from instantly building everything they unlock. In the V0.1 beta, the queue has a limited number of simultaneous projects, and each project consumes resources and time. When the queue is full, you cannot start new construction until an existing project completes or is canceled.
Effective queue management means prioritizing projects that unlock further progression. A Supermarket or Mall generates reliable income that funds future construction, making them strong early queue choices. A Factory feeds industrial production chains that unlock steel and vehicle output, which are prerequisites for advanced buildings. Players who fill their queue with low-value decorative structures often find themselves waiting with idle resources while competitors surge ahead.
Optimizing Construction Speed and Capacity
Construction speed in Build and Conquer is not a fixed stat; it scales with your city's infrastructure and the number of active workers assigned to building projects. The build and conquer construction speed guide approach focuses on reducing the time between unlocking a building and actually placing it in your city. Every minute a structure sits unbuilt is a minute of lost production or population growth.
The most impactful speed improvements come from upgrading your building capacity early. Building capacity determines how many structures your city can support at once, and it is separate from the construction queue. A common mistake is confusing these two systems: the queue limits simultaneous construction, while capacity limits total placed buildings. Running out of capacity forces you to demolish or upgrade existing structures before placing new ones, which wastes resources and time.
| Speed Factor | Impact on Construction | How to Improve |
|---|---|---|
| Worker assignment | Reduces build time per project | Assign more workers to active projects |
| Infrastructure level | Unlocks faster build methods | Upgrade roads and power supply |
| Resource stockpile | Prevents construction pauses | Maintain surplus of steel and concrete |
| Queue efficiency | Maximizes parallel progress | Avoid low-value projects in queue |
The build and conquer building capacity system rewards players who plan their city layout around expansion. Leaving open plots for future structures prevents the need to demolish working buildings when new tiers unlock. Community players report that capacity upgrades are among the best early investments because they compound with every subsequent building unlock.
Speeding Up Individual Projects
Individual construction projects can be accelerated through worker assignment and resource pre-staging. When you start a building, the game assigns a default number of workers based on the structure's tier. Manually increasing worker count reduces build time but consumes more resources per hour, creating a trade-off that favors players with strong resource income.
The build and conquer construction speed guide principle is to keep your highest-value projects moving at maximum speed while letting low-priority structures progress at default rates. A Nuclear Power Plant might justify maximum worker assignment because it unlocks heavy industry, while a decorative park can wait. This prioritization keeps your queue productive without draining your resource stockpile.
Placing Buildings for Maximum Efficiency
Placement is where unlock knowledge meets practical city design. Unlocking a building is only half the battle; placing it in a suboptimal location wastes its potential and can block future expansion. The build and conquer apartment placement tips that circulate in the community emphasize proximity to workplaces and road access as the two most important factors for residential structures.
The build and conquer building spacing rule is straightforward but frequently violated: leave enough space between structures to allow for road expansion and future upgrades. Buildings placed too close together cannot be upgraded without demolition, and roads squeezed between tight structures create traffic bottlenecks that slow resource delivery. A grid layout with consistent spacing is the most forgiving approach for new players.
Apartment and Housing Placement
Apartments and suburban houses serve different roles in your city, and their placement should reflect those roles. The Mid-rise Apartment is a compact housing solution that works best near commercial and industrial zones, where workers need short commutes. Suburban houses in Build and Conquer provide lower population per tile but offer stability and aesthetic value, making them suitable for outer districts where space is less constrained.
The build and conquer apartment placement tips that veteran players share focus on clustering apartments around employment centers. A cluster of three or four Mid-rise Apartments near a Factory or Supermarket reduces worker travel time, which indirectly improves production efficiency. Spreading apartments across the map creates long commutes that slow down your city's economic output.
| Housing Type | Population per Tile | Best Placement | Upgrade Potential |
|---|---|---|---|
| Suburban House | Low | Outer districts | Moderate |
| Mid-rise Apartment | 32 base, 48 upgraded | Near employment | High |
| High-density Housing | High | City center | Very high |
| Mixed-use Building | Medium | Commercial corridors | Moderate |
The build and conquer suburban houses strategy works best when you have abundant land and want to build a stable tax base without committing to high-density infrastructure. Suburban houses require less power and road capacity than apartments, making them a low-risk expansion option for players who are still learning the unlock system.
Industrial Zone Layout
The build and conquer industrial zone layout is the most placement-sensitive part of your city. Industrial buildings generate pollution and noise, which reduce the desirability of nearby residential areas. Placing a Factory next to an apartment cluster will depress population growth and may even cause residents to leave, undoing the population gains you worked to achieve.
The standard industrial layout keeps factories and power plants on the city's edge, separated from residential zones by a buffer of commercial buildings or green space. This buffer absorbs the negative effects of industry while keeping workers close enough to commute. The Nuclear Power Plant is a special case because it provides massive energy output but carries significant risk; community players recommend placing it as far from housing as possible while still connecting it to the power grid.
Advanced Unlock Strategies and Progression Planning
Planning your unlock order is the difference between a smooth progression and a frustrating stall. The build and conquer how to unlock buildings process rewards players who think two or three unlocks ahead rather than reacting to each new option as it appears. A deliberate unlock order ensures that each new building supports the next tier's requirements.
The Supermarket and Mall are the strongest early unlocks because they generate the income needed to fund everything else. A player who rushes industrial buildings without commercial income will find themselves resource-starved and unable to afford the next construction project. The Factory is a mid-game priority because it unlocks steel and vehicle production, which are prerequisites for advanced structures.
| Unlock Order | Building Type | Strategic Value | Risk Level |
|---|---|---|---|
| 1 | Supermarket | Reliable income | Low |
| 2 | Mid-rise Apartment | Population growth | Low |
| 3 | Factory | Industrial production | Medium |
| 4 | Mall | High income scaling | Medium |
| 5 | Nuclear Power Plant | Heavy industry energy | High |
| 6 | Bunker & Air Raid Siren | Civil defense | Situational |
The Bunker and Air Raid Siren are civil defense structures that soften incoming attacks, making them valuable for players on competitive servers where raids are common. These structures do not contribute to economic growth, so they should be unlocked after your income and production base is stable. Players who rush civil defense early often find themselves unable to afford the economic buildings that actually win games.
Avoiding Common Unlock Mistakes
The most common unlock mistake in Build and Conquer is treating every new building as equally valuable. The build menu fills with options as you level up, but not all of them deserve immediate construction. A player who builds every unlocked structure as soon as it appears will run out of capacity, resources, and queue slots, leaving them unable to build the structures that actually matter.
Another frequent error is ignoring the build and conquer building spacing requirements when placing new unlocks. A building placed in a tight corner might work initially, but it will block road expansion or prevent adjacent structures from upgrading later. Demolishing and rebuilding wastes resources that could have funded the next unlock, setting your progression back by hours.
The building requirements guide breaks down the specific prerequisites for each structure tier, which helps you plan your unlock order before committing resources. Understanding these requirements in advance prevents the frustration of unlocking a building only to discover you cannot afford to place it.
Frequently Asked Questions
How do I unlock buildings faster in Build and Conquer?
Focus on city level progression and keep your construction queue full of high-value projects. Prioritize Supermarket and Mall unlocks for income, then use that income to fund faster worker assignment on subsequent buildings. Avoid filling the queue with low-value decorative structures that delay critical unlocks.
What is the best early building to unlock first?
The Supermarket is the strongest first unlock because it generates reliable income that funds all future construction. A Mid-rise Apartment is the second priority because its 32 base population, scaling to 48 when upgraded, unlocks higher building tiers. Together they form the economic foundation for everything else.
How does building capacity differ from the construction queue?
Building capacity limits how many total structures your city can support at once, while the construction queue limits how many projects you can build simultaneously. Running out of capacity forces you to demolish or upgrade existing buildings before placing new ones, which wastes resources and slows progression.
Where should I place industrial buildings?
Place industrial buildings on the city's edge, separated from residential zones by a buffer of commercial buildings or green space. The Nuclear Power Plant should be as far from housing as possible while still connecting to the power grid. This layout prevents pollution from depressing population growth in your apartment clusters.
Are civil defense buildings worth unlocking early?
No, the Bunker and Air Raid Siren are situational structures that do not contribute to economic growth. Unlock them after your income and production base is stable, typically in the mid-to-late game. Players who rush civil defense early often lack the resources to build the economic structures that actually win matches.
Mastering the building unlock system in Build and Conquer requires balancing city levels, construction queues, and tier requirements while planning your placement for long-term efficiency. The players who progress fastest are those who treat each unlock as part of a deliberate strategy rather than a reactive purchase. Focus on income-generating structures first, maintain proper spacing, and keep your queue productive, and your city will expand steadily through every tier the game offers.