
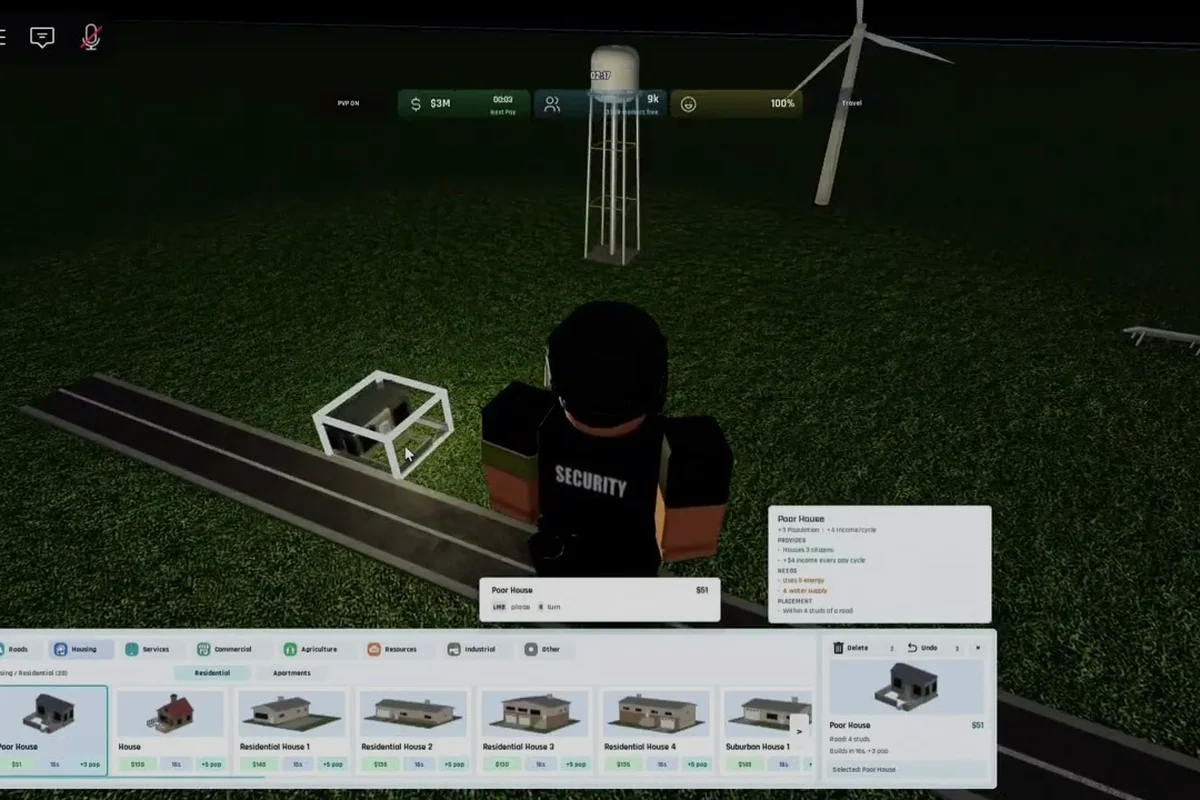
Winning wars in Build and Conquer during the V0.1 beta comes down to a tight, repeatable loop: stabilize your city, grow your population to 250, hit city level 2, and then turn the military tree loose with your first missile strikes. Most new commanders lose because they sprint straight into combat before their economy and infrastructure can actually support a war machine. This Build and Conquer guide walks through every step of that early-game escalation so your first PvP encounter ends with enemy cities in ruins instead of yours.
Getting Your City Ready for War in Build and Conquer
Before you ever build a single military structure, the early game is about turning an empty plot of land into a functioning city level 1 settlement. The V0.1 beta is unforgiving: if your starter infrastructure collapses, your population growth stalls and you will never reach the population threshold required to unlock soldiers. According to community testing shared on the Build and Conquer Reddit community, the cleanest path is to focus on the build and conquer beginner quest guide steps first and treat warfare as a delayed payoff.
Placing Starter Housing and Early Population
Your first click should always be a row of mid-rise apartments, not single-family houses. Mid-rises pack more residents into a smaller footprint, which means you reach the 250 population gate faster and with less road upkeep. Spread them in clusters of three to five buildings so a single road segment can serve all of them, and avoid placing housing on slopes until you have unlocked the terrain grading tool.
The build and conquer how to manage population loop has three moving parts: housing capacity, service coverage, and happiness. If any of those drops below the threshold, citizens start emigrating and your population number will visibly shrink in the HUD. The table below shows the early-game service buildings you should prioritize and what each one actually does for your population meter.
| Service Building | Population Effect | Build Cost Tier | Priority |
|---|---|---|---|
| Supermarket | +10% growth in radius | Cheap | High |
| Mall | +20% growth in radius | Medium | High |
| Elementary School | Slows emigration | Medium | Medium |
| Clinic | Slows emigration | Medium | Medium |
| Park | +Happiness buffer | Cheap | Low |
Connecting Roads, Water, and Power
Every building in your city needs three connections to function: a road segment for citizens to walk, a water pipe for supply, and a power line for electricity. If any one of those is missing, the building renders as inactive and contributes zero to your population. The build and conquer how to build roads and bridges mechanics are surprisingly deep for a beta title: roads have upgrade tiers, and bridges are required to cross rivers without breaking the road network.
In the build and conquer beta guide V0.1 build, the road tier breakdown determines not just travel speed but also how aggressively your nation can project logistics toward rival borders — upgrading from Asphalt to a Two-Lane Highway doubles the speed multiplier (1.5x → 2.0x) and lets supply convoys reach a contested frontline tile roughly 33% faster in timed conquer nation scenarios. Bridge Spans cost more per tile but are mandatory over river tiles, otherwise the road network severs and your attack column has to reroute, losing two to three turns of momentum during a multi-city offensive. For a build and conquer beginner quest guide player, the practical rule is to commit to Asphalt first across all domestic clusters before unlocking the Highway, since scattered tier-1 roads cap your entire nation's movement throughput at the lowest segment in the chain.
| Road Type | Speed Multiplier | Cost per Tile | Unlock Requirement |
|---|---|---|---|
| Dirt Path | 1.0x | Free | Default |
| Asphalt Road | 1.5x | Low | City level 1 |
| Two-Lane Highway | 2.0x | Medium | City level 2 |
| Bridge Span | 1.5x | High | Asphalt unlocked |
Water networks follow a similar upgrade curve. Lay water towers at the highest point in your city, then run pipe segments downhill to every residential cluster. If a pipe segment is interrupted by a road that crosses over it, the connection breaks and the buildings downstream lose water. Power lines are the easiest: they ignore terrain and can be chained tower-to-tower without a road underneath, which makes them the first utility you finish wiring up across the whole map.
Hitting City Level 2 and Unlocking the Military Tree
The single biggest milestone in any build and conquer beta guide is reaching city level 2, because that is the moment the military tree becomes available. Before level 2, you can build civilian infrastructure and watch your population grow, but the military base, barracks, and missile silo structures are all locked behind a hard population gate. Community data confirms that the threshold is 250 residents with full service coverage.
Population Management at the Level 2 Threshold
Managing population is not just about cramming apartments onto every tile. In the V0.1 beta, three failure modes show up over and over in early-war losses logged between match minute 5 and 15, and recognizing them early is what separates a Tier 1 economy from a stalled city that never reaches the 250-population military threshold. The first two are planning errors — over-stacking high-density housing without amenities, or letting a residential cluster drift outside service coverage. The third is structural: a single broken power line from a saboteur's early raid can disable an entire neighborhood, and because population growth requires powered housing tiles, the cascade hits harder than the loss of one grid. Catching these three patterns before minute 10 is the core of the build and conquer how to win against other nations economy loop.
-
Happiness collapse: too many high-density buildings without parks, schools, or clinics
-
Service desert: a residential cluster outside the radius of any supermarket or mall
-
Power outage: a single broken power line can disable an entire neighborhood
If your population growth stalls between 180 and 230, the fastest fix is almost always dropping a second supermarket next to the lagging cluster. Supermarkets have a large coverage radius, generate passive income, and apply a growth multiplier that compounds with mall coverage. The build and conquer how to manage population question is really a service-coverage question once you get past the housing step.
A simple rule of thumb from the V0.1 beta: keep at least one supermarket within range of every six mid-rise apartments, and place a mall in the densest part of your city before you start building military structures. That setup reliably pushes the population meter past 250 within the first 15 minutes of a match.
What the Military Tree Unlocks
Once you cross the 250 population threshold, a notification pops up and the military tab appears in the build menu. The first four structures you can place are the ones that actually decide wars in the early game, because everything you build before population 250 — houses, roads, and bridges from the build and conquer beginner quest guide — contributes nothing to your offensive capacity. Each of these four structures costs a flat 500 gold plus a small materials bundle, and placement must occur on cleared land within your city radius, so veterans always queue them in a tight cluster near the border tile closest to their planned invasion route to minimize troop travel time.
| Military Structure | Primary Function | Prerequisite |
|---|---|---|
| Military Base | Unlocks soldiers and patrols | City level 2 |
| Barracks | Trains infantry units | Military Base |
| Anti-Air Turret | Defends against airstrikes | Military Base |
| Missile Silo | Unlocks your first missiles | Military Base + Barracks |
The missile silo is the keystone structure. Until it is built, your only offensive option is sending infantry into enemy territory, which is slow, expensive, and easily countered by a single anti-air turret. The moment your first missile is loaded, the strategic map tilts in your favor.
Stockpiling Money Before Funding Troops
The V0.1 beta economy punishes commanders who build military structures on credit. If you drain your treasury to rush a missile silo, your civilian services collapse, your population growth reverses, and you lose the 250 population gate within minutes. The correct move is to stockpile at least 5,000 in-game currency before placing a single military building.
Income Sources Ranked by Stability
Not all income is equal in Build and Conquer. Tax income fluctuates with population, industrial zones can go offline if power fails, and commercial buildings only pay out when citizens are actually shopping. The table below ranks the most stable income sources you can build before the first war:
| Income Source | Stability | Income per Minute | Notes |
|---|---|---|---|
| Supermarket | Very High | 40 | Scales with population radius |
| Mall | Very High | 80 | Larger radius, slower payoff |
| Tax Office | High | 60 | Requires happy population |
| Industrial Zone | Medium | 120 | Vulnerable to power outages |
| Tech Park | Medium | 150 | Unlocks at city level 3 |
A balanced early economy leans heavily on supermarkets and malls because they are nearly impossible to disrupt without a direct missile strike on the building itself. Industrial zones are tempting because of the higher per-minute income, but they require a stable power grid and a connected road network, and they go dark the moment an enemy sabotages your power plant.
When to Switch from Economy to Military
The cleanest transition point is the moment your passive income exceeds 300 per minute and your savings pass 5,000. At that point, any further investment in civilian infrastructure has diminishing returns, and every extra dollar is better spent on soldiers, turrets, and missile reloads. If you wait too long and a rival commander declares war first, you will be defending with bare hands against a fully stocked enemy.
Your First Strike: Building and Firing Missiles
Missiles are the highest-impact offensive tool in the V0.1 beta. A single missile strike against an enemy city can disable a power plant, destroy a military base, or crater a population cluster in one hit. According to community footage of how to win against other nations in Build and Conquer, the first missile is almost always a decapitation strike against the enemy military base because that removes their ability to retaliate.
Target Priority for Your First Missile
| Target | Impact | Risk |
|---|---|---|
| Enemy Military Base | Disables their entire military tree | High retaliation if they have anti-air |
| Enemy Power Plant | Drops their whole city's productivity | Forces slow rebuild |
| Enemy Missile Silo | Removes their first-strike option | Often heavily defended |
| Enemy Mall | Craters their income | Lowest strategic value |
The optimal opening salvo, in order, is: enemy military base, then enemy power plant, then enemy missile silo. That three-strike sequence breaks most opponents' war momentum because they lose the ability to build, the electricity to run what they already have, and the option to fire back.
Defending Your Own Missiles
A missile silo is a juicy target, and rival commanders know it. Before you fire your first missile, build at least two anti-air turrets within range of your silo. Turrets are cheap, fire automatically when an enemy missile enters their radius, and can shoot down one incoming strike per reload cycle. The early-war defenders who survive the longest are the ones who treat their own missile silo as a priority target before they ever think about attacking.
The defensive layout that wins most early wars stacks redundancy in a tight cluster around your missile silo rather than spreading turrets thin across the map — two anti-air turrets at opposite corners give overlapping coverage, a military base within two tiles screens the radius with free infantry patrols, and a single road loop connecting the silo to a power plant keeps reload timers ticking even after the first strike lands; commanders who skip the road connection often watch a fully-loaded silo sit idle for 8–10 seconds while a second volley closes in, which is why the winning blueprint always treats the silo as a self-contained fortress node rather than a lone landmark.
-
Two anti-air turrets flanking the missile silo
-
One military base tucked behind the silo so infantry patrols screen the area
-
Road and power connections so the silo can actually reload
Protecting Your Population After You Hit City Level 2
The moment you unlock the military tree, you also paint a target on your city. Rival commanders who see the city level 2 notification will start probing your borders with infantry patrols and looking for soft population clusters. The build and conquer beginner quest guide loop does not formally cover post-unlock defense, which is why so many first-time war attempts end with a retaliatory strike that wipes out the population cluster you spent 20 minutes building.
Population Defense in Layers
A layered defense is more efficient than clustering every apartment in a single fortified block. Spread your population across three to five districts, each with its own supermarket, mall, and power connection. If one district takes a missile hit, the other four keep functioning and your population meter only dips instead of collapsing. The internal population growth guide breaks down the exact service ratios for a multi-district layout, but the short version is: never let a single enemy strike remove more than 20% of your population.
| Defense Layer | Function | Cost |
|---|---|---|
| Anti-Air Turret | Shoots down missiles | Cheap |
| Infantry Patrol | Screens borders | Medium |
| Fortified Block | Reduces missile damage | High |
| Decoy Silo | Misdirects enemy strikes | High |
Recovering From a Population Hit
Even with a layered defense, a well-placed enemy missile will crater one of your districts. The recovery loop has three steps: rebuild the supermarket first (it restores growth in the damaged radius), then restore power and water, then replace housing last. New citizens will not move into a district without services, so housing is useless until the underlying utilities are back online. A damaged city that follows this recovery order can rebuild from a single missile hit in under five minutes, which is faster than most opponents expect.
Frequently Asked Questions
How do I win against other nations in Build and Conquer as a new player?
Focus on hitting 250 population and city level 2 first, then build a military base and a missile silo before engaging any rival commander. Stockpile at least 5,000 in-game currency so your civilian services do not collapse the moment you switch to war spending. Your first strike should target the enemy military base to disable their retaliation options.
How do I manage population effectively during the V0.1 beta?
Keep at least one supermarket within range of every six mid-rise apartments and place a mall in your densest residential cluster. Avoid stacking high-density housing without parks, schools, or clinics because the happiness collapse will trigger emigration and reverse your growth. Service coverage matters more than raw housing count once you pass 100 residents.
When can I build roads and bridges in the game?
Roads are available from the start of every match, but asphalt upgrades and bridge spans require city level 1 and a connected power grid. Bridges are mandatory for crossing rivers without breaking the road network, and the two-lane highway tier unlocks at city level 2 alongside the military tree. Lay asphalt before placing military structures so supply trucks can actually reach your missile silo.
What is the fastest way to unlock the military tree?
The military tree unlocks the moment your city crosses the 250 population threshold with full service coverage. The fastest path is a cluster of mid-rise apartments, one mall in the center, and a supermarket covering the outer ring. Most new commanders hit the threshold within 15 minutes if they ignore industrial zones and focus on residential + commercial service buildings.
Can I win a war without firing a single missile?
Yes, but it is much harder in the V0.1 beta. A pure-infantry rush can capture an enemy military base if they have no anti-air coverage, but the moment they build a single turret, your advance stalls and you lose the initiative. Missile strikes are the most reliable opening move because they remove enemy defenses faster than infantry can be trained.