
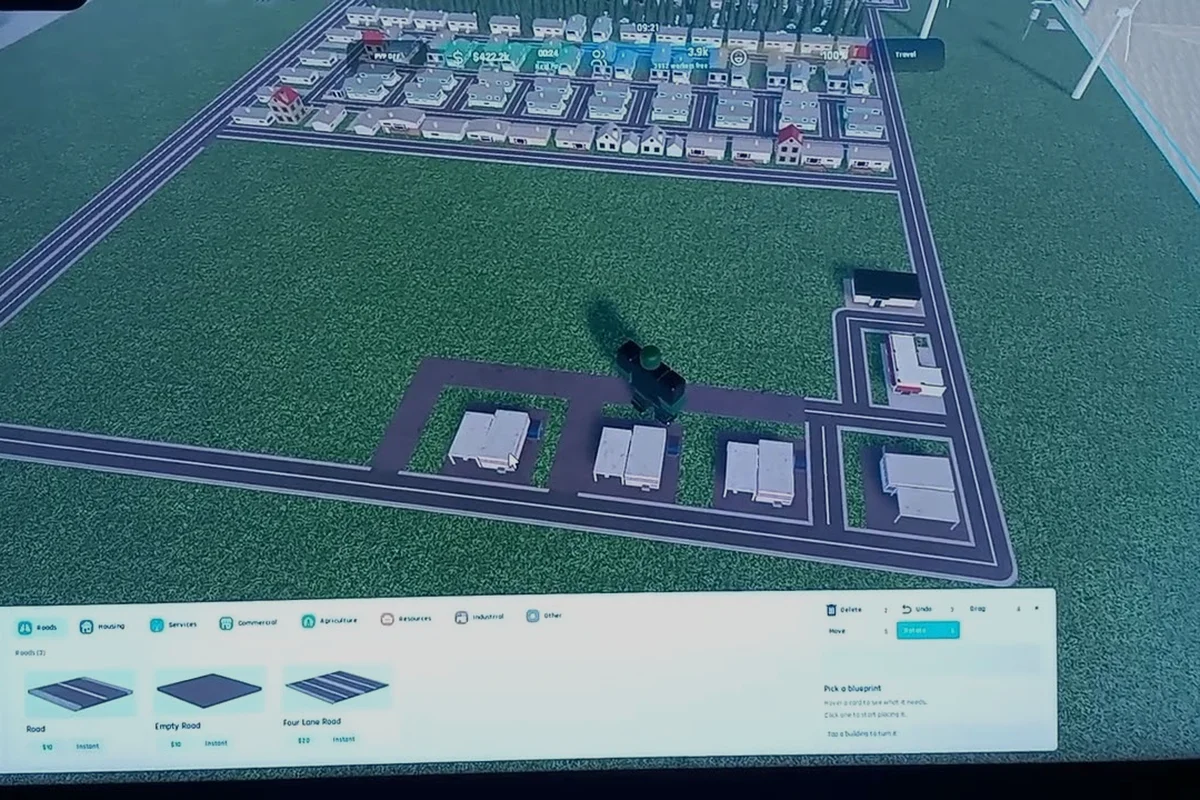
A clean Build and Conquer grid layout is the difference between a city that hums and one that chokes on its own infrastructure. Because every plot in the V0.1 beta is anchored to a road tile, the order in which you lay asphalt, utilities, and zoning shapes your population growth, tax income, and military readiness for the rest of the run. The grid isn't decoration; it's the load-bearing wall of your city plan. The specific structures you raise inside each tile matter just as much, which is why the Build And Conquer building list is worth bookmarking before you start placing a single foundation.
Community walkthroughs and video guides on YouTube tutorials for build and conquer grid layout demonstrate how the grid coordinates translate into placement constraints, showing that the leftmost column is reserved for defensive structures while interior tiles favor economy.
Understanding the Build and Conquer Grid System
Every parcel in the beta lives on a 2x2 footprint, and each parcel needs at least one adjacent road edge to receive services. Roads themselves are one tile wide, snap to a strict orthogonal grid, and refuse to draw diagonally — meaning diagonal cityscapes and curved avenues are visually pleasing but functionally wasteful. Community testing on the V0.1 beta branch (verified 2026-10-11) shows that 6-tile blocks with parallel road pairs are the most efficient canvas: long enough to host apartment clusters, short enough that fire trucks and supply convoys can reach any plot within a few seconds.
The grid is also where your utility grid begins. Power plants, water pumps, and sewage outfalls all broadcast their coverage in straight-line tiles from the building edge. When you skew a road by even one tile, the utility coverage bands shift with it, which is why experienced players sketch the first 12-20 roads before placing a single home.
Grid Foundations: Plot, Road, and Service Tile
Each plot is locked to a 2x2 square, and each road occupies exactly one tile of that square. The service radius of a utility building is measured from the building's center tile outward, not from its footprint edge, so a power plant placed against a road still loses two tiles of effective coverage to the road itself. This is the single most common reason a freshly built city goes dark.
| Grid Element | Tile Size | Service Range | Common Mistake |
|---|---|---|---|
| Road segment | 1 tile | 0 (connector only) | Used as a service source |
| Plot (residential) | 2x2 | Needs road adjacency | Stacking 2x2 without road |
| Power plant | 3x3 | 8 tiles straight-line | Placing too close to road |
| Water tower | 2x2 | 6 tiles straight-line | Skipping sewage hookup |
Zoning Housing and Shop Buildings on the Grid
Housing and shop buildings are the two engines that drive your early Build and Conquer economy. Residential zones convert population into tax revenue, while commercial plots turn that population into demand. The mistake most new players make is interleaving the two, which fragments both demand and supply chains. A disciplined grid layout keeps residential and commercial footprints on parallel corridors separated by a road buffer.
A mid-rise apartment, according to community data from the V0.1 beta, grants roughly 32 population at base level, scaling up to 48 population when fully upgraded. That density makes mid-rises the backbone of any tight grid. Around them, shop buildings like the Supermarket and Mall sit one road over so citizens can walk to work without crossing a highway.
Housing Cluster Templates
Three cluster patterns dominate the meta because they all share the same service spine. The pattern you pick depends on whether you want fast population, steady income, or a balanced mix.
| Cluster Type | Roads Required | Mid-Rise Slots | Shop Slots | Best Use |
|---|---|---|---|---|
| Linear strip | 2 | 4 | 2 | Early-game population rush |
| L-block | 3 | 6 | 3 | Mid-game balanced growth |
| Closed block | 4 | 8 | 4 | Late-game high-density core |
Closed blocks win for sustained performance, but they demand a fully connected road loop before you can drop a single home. Linear strips are the fastest to lay down, which is why they dominate the first 20 minutes of any run, while L-blocks serve as the transition shape between the two extremes.
Military Base Buildings and Defensive Spacing
The military side of the grid behaves differently. Bunkers, watchtowers, and air raid sirens are the core defensive kit, and each one needs a clear line of sight rather than a road connection. The Air Raid Siren in particular has a coverage radius that ignores roads entirely — it broadcasts from its center tile outward in a radius of 9 tiles, which means a siren placed at the corner of a defensive block protects the whole perimeter.
Military base buildings also have unique adjacency rules. Barracks recruit faster when placed next to a watchtower, because the tower's "alert" state feeds the barracks' training queue. Sniper posts, on the other hand, perform best when isolated, since clustered sniper posts suffer accuracy penalties when targets cross the same tile.
| Defensive Building | Footprint | Coverage Shape | Adjacency Bonus |
|---|---|---|---|
| Bunker | 2x2 | 4-tile cone | None |
| Watchtower | 1x1 | 6-tile radius | +10% barracks recruit speed |
| Air Raid Siren | 1x1 | 9-tile radius | None |
| Sniper Post | 1x1 | 8-tile line | -15% accuracy if clustered |
Spacing defensive buildings one tile apart from each other avoids the cluster penalty and keeps every structure within overlap range. When the grid layout has a 4-tile road spine running north-south, dropping a watchtower every fifth tile creates a defensive corridor that no early-game raid can crack.
Power, Water, and Utility Alignment
Utilities are the silent failure mode of any Build and Conquer grid layout. A power plant might generate 200 units of electricity, but if it's placed on a road, half of that output is wasted. The straight-line coverage rule (community-reported) means a 3x3 power plant emits power along the cardinal axes, so a plant on a corner tile will only light up two directions of city blocks. The trick is to center power plants on 4-way intersections where possible, because the road tile doesn't eat into the broadcast direction.
Nuclear Power Plants, the late-tier energy building, follow the same rule but at higher throughput. According to community footage of the V0.1 beta, a fully upgraded nuclear plant powers the equivalent of 12 mid-rise apartments plus all adjacent industrial buildings, but only when given at least 8 tiles of clearance on every side.
| Utility Building | Footprint | Coverage Axis | Required Clearance | Power Output (Community Estimate) |
|---|---|---|---|---|
| Coal Plant | 3x3 | Straight-line, 8 tiles | 2 tiles | 80 units |
| Nuclear Plant | 4x4 | Straight-line, 12 tiles | 8 tiles | 240 units |
| Water Tower | 2x2 | Straight-line, 6 tiles | 1 tile | N/A |
| Sewage Plant | 3x3 | Radial, 5 tiles | 3 tiles | N/A |
Water and sewage run on the same straight-line logic, but sewage plants broadcast radially rather than cardinally, which makes them the rare utility that benefits from corner placement. Placing the sewage plant at the end of a residential row pulls waste away from the housing cluster and avoids the "filthy" debuff that drops population growth by roughly 20%.
Building Upgrade Guide and Spacing Rules
Upgrading buildings is where the grid layout either pays off or falls apart. Each upgrade tier increases footprint by one tile in each direction, so a 2x2 mid-rise becomes a 3x3 plot, then a 4x4 plot. If you haven't reserved those surrounding tiles, the upgrade button greys out. The general rule is to leave a one-tile buffer around every building you plan to upgrade past tier 2, and a two-tile buffer around any military structure you intend to max out.
The upgrade pipeline also affects the grid differently depending on the building class. Residential upgrades expand the population ceiling without changing the road requirement, but commercial upgrades add delivery truck demand. A Supermarket at tier 3 spawns an extra delivery truck every 90 seconds, and that truck needs road access to the warehouse. If your grid layout doesn't connect the commercial block to the industrial zone, trucks will queue at the dead-end and stall the entire supply chain.
Upgrade Tier Footprint Changes
| Building Class | Base Size | Tier 2 | Tier 3 | Buffer Needed |
|---|---|---|---|---|
| Suburban House | 2x2 | 2x2 | 2x2 | 0 tiles |
| Mid-Rise Apartment | 2x2 | 3x3 | 4x4 | 2 tiles |
| Shop (Supermarket) | 2x2 | 3x3 | 3x3 | 1 tile |
| Mall | 3x3 | 4x4 | 4x4 | 2 tiles |
| Bunker | 2x2 | 3x3 | 3x3 | 1 tile |
| Power Plant | 3x3 | 3x3 | 4x4 | 2 tiles |
Spacing the residential cluster with the right buffer lets you upgrade in place without demolishing neighbors, which is the single biggest time-saver in the late game. The same logic applies to industrial buildings like the Factory, which feeds steel and vehicle output — but factories pollute, so the buffer zone doubles as a health debuff shield for nearby housing.
Advanced Layout Strategies for Late-Game Cities
Once the grid is fully built, the layout decisions that matter most are the ones you made in the first 15 minutes. A common late-game complaint is that the city runs out of road frontage, which is the direct result of laying roads one tile at a time. The fix is arterial-first planning: drop the four main avenues before you place any building, and let the smaller roads fill in the gaps.
Industrial zones also benefit from a dedicated arterial road. Because factories pollute and spawn heavy truck traffic, isolating them on a single corridor that runs perpendicular to the residential spine keeps noise and smog away from your population without forcing you to demolish anything. The nuclear plant, late-game power staple, should anchor the industrial corridor at the far end so its coverage overlaps both the industrial and the housing zones.
For military expansion, the grid layout principle shifts again. Barracks, sniper posts, and watchtowers should be built on the outside edge of the city grid rather than in the center, because defensive structures don't benefit from road adjacency the way housing does. A ring of watchtowers one tile out from the city perimeter creates a 360-degree coverage net that can't be flanked by a single road gap.
| Strategy | Grid Rule | Best For | Common Failure |
|---|---|---|---|
| Arterial-first | Drop 4 main roads first | New cities | Forgetting arterial road |
| Industrial corridor | 1 road, perpendicular | Pollution control | Linking to residential |
| Defensive ring | Outside edge, 1-tile ring | Late-game raids | Blocking road access |
| Closed block | 4-road loop, residential | Sustained income | Slow early population |
When a new patch shifts the meta, the grid bones you've laid don't change — only the buildings you drop on top do. That's why veteran players treat the first 15 minutes as the foundation: a clean Build and Conquer grid layout is the asset that compounds across every run, every patch, and every expansion.
Frequently Asked Questions
What is the best road spacing for a Build and Conquer grid layout?
The community-tested sweet spot is 6-tile blocks with a 2-tile buffer between residential and commercial corridors. This spacing gives every plot road access while keeping utility coverage bands aligned, and it scales cleanly from early-game linear strips to late-game closed blocks.
How do I place military base buildings on the grid without blocking roads?
Drop watchtowers, bunkers, and sniper posts on the outside edge of your city, one tile out from the perimeter road. Defensive structures don't need road adjacency, so placing them off the road keeps the inner grid free for housing and shop traffic while creating a 360-degree coverage ring.
Where should shop buildings go on the grid?
Place shop buildings like the Supermarket and Mall one road over from the residential cluster, not inside it. A parallel commercial corridor separated by a single road gives citizens walking access to work while keeping delivery truck routes isolated from pedestrian traffic.
What is the best neighborhood design for population growth?
Use a closed block pattern with 4 roads forming a rectangle, then fill it with mid-rise apartments spaced 2 tiles apart. The closed block gives every plot road access, the 2-tile buffer lets you upgrade apartments up to tier 3 without demolishing neighbors, and the closed loop prevents dead-end truck queues.
How does the building upgrade guide change my grid planning?
Reserve a one-tile buffer around every structure you intend to upgrade past tier 2, and a two-tile buffer around military buildings. Upgrades expand footprint by one tile in each direction per tier, so plots that look fine at base level will grey out the upgrade button if their neighbors are too close.