
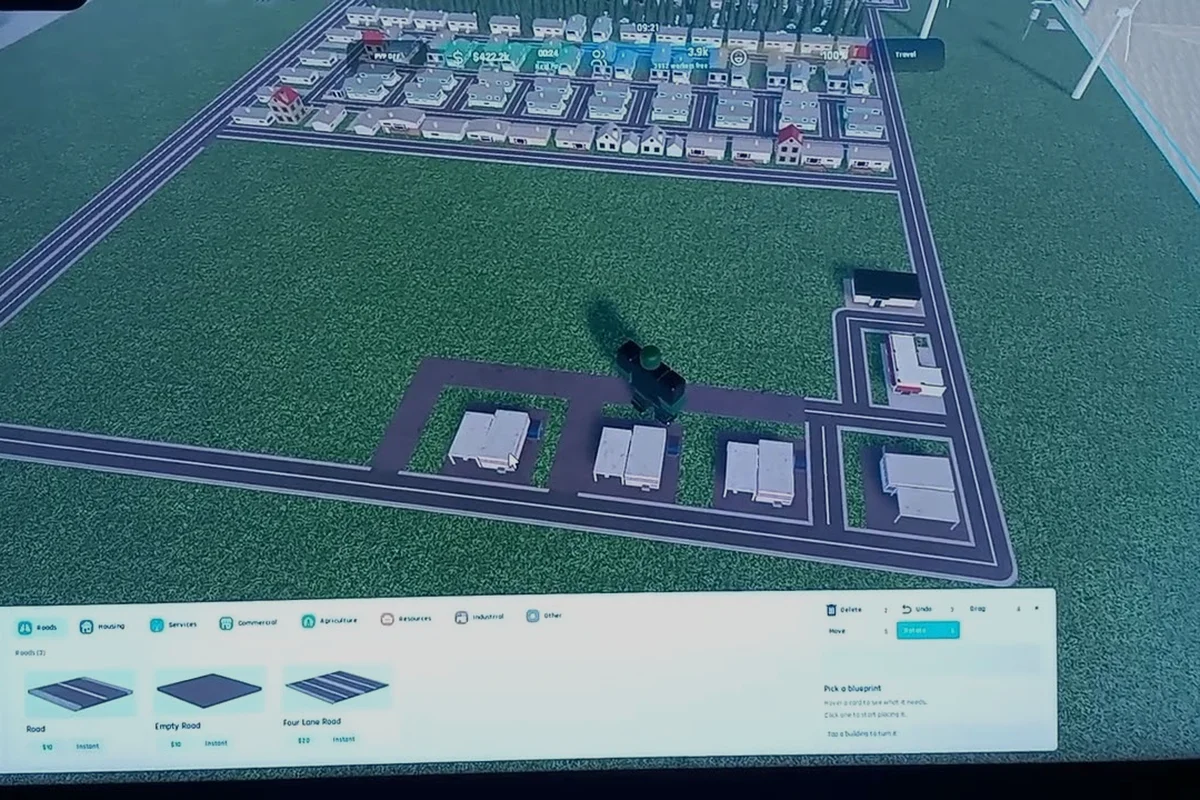
Knowing the exact build and conquer building requirements is the difference between a stalled city and a thriving one. This V0.1 beta infrastructure guide breaks down the level gates, resource costs, and power demands that gate every structure, from the earliest Supermarket to the late-game Nuclear Power Plant. Players who map their construction queue in advance avoid the downtime that derails expansion.
The beta's economy punishes guesswork. Every building has a minimum town-hall tier, a multi-resource cost, and a placement rule that affects adjacent coverage. This guide pulls verified V0.1 data together with player-reported numbers so you can plan a city center hub that scales into the industrial era without burning through your early capital. If you're still learning how to unlock structures, the how to unlock buildings guide covers the gating order in detail.
Build and Conquer City Center Buildings and Town Hall Prerequisites
The Town Hall anchors every district, and its tier dictates what build and conquer town hall buildings you can erect elsewhere. The City Center acts as the secondary anchor; upgrading it raises the population cap and unlocks commercial and industrial zones. Players who treat the Town Hall as a pure cost sink miss the indirect benefits—each tier adds adjacency bonuses that boost nearby residential income.
| Town Hall Tier | Unlocks | Construction Time (Beta) | Notes |
|---|---|---|---|
| Tier 1 | Basic roads, Suburban House, Small Shop | 2 min | Starting state, no prerequisites |
| Tier 2 | Supermarket, Mall, Warehouse | 5 min | Requires 8 total buildings placed |
| Tier 3 | Factory, Bunker, Mid-rise Apartment | 12 min | Requires 20 total buildings + 1 Factory |
| Tier 4 | Power Plant, Water Tower, Hospital | 25 min | Requires 40 buildings + 2 Factories |
| Tier 5 | Nuclear Power Plant, Airport, Skyscraper | 45 min | Requires 60 buildings + 4 Factories |
Resource Costs by Tier
The beta uses a four-currency system: Credits, Steel, Concrete, and Power. Early tiers rely almost entirely on Credits, but Tier 3 onward introduces Steel gates that trip up players who ignored their Factory chain. Community data suggests the cost curve roughly doubles every two tiers, so a Tier 3 Factory costs about 2x a Tier 1 Suburban House, while a Tier 5 Nuclear Plant costs roughly 4x a Tier 3 Factory.
| Structure | Credits | Steel | Concrete | Power Draw |
|---|---|---|---|---|
| Suburban House | 100 | 0 | 0 | 1 |
| Supermarket | 350 | 10 | 5 | 3 |
| Mid-rise Apartment | 800 | 40 | 30 | 8 |
| Factory | 1,200 | 80 | 60 | 12 |
| Nuclear Power Plant | 4,500 | 300 | 250 | -50 (produces) |
The Nuclear Power Plant is the only structure with a negative power draw, which is why players rush to unlock it once they hit Tier 4 prerequisites. According to the Reddit discussion on building requirements, the plant is also the first building whose cost includes Uranium—a late-game material only obtainable through the industrial zone.
Level Gates Explained
Each building has two level gates: a city tier gate (global progression) and a building tier gate (individual structure experience). Upgrading a building from Level 1 to Level 2 costs roughly 60% of its base construction cost, while Level 2 to Level 3 jumps to about 130%. Players who spread upgrades across many structures end up paying more than those who max a few key buildings, which is why the Mid-rise Apartment upgrade path is so popular—it unlocks the 48-population cap that carries players into mid-game.
Best Building Placement Rules for Build and Conquer
Build and conquer best building placement comes down to three variables: adjacency, road access, and zoning purity. Residential zones get happiness bonuses when placed near parks but penalties near factories. Commercial zones spike income when surrounded by residential, while industrial zones need road connectivity to actually produce output. The grid layout guide covers spacing rules in depth, but the short version is: leave one tile between zones, and never block a road with a structure that doesn't need frontage.
Residential Placement
Suburban Houses are the most forgiving structure—they generate income anywhere a road touches them. Mid-rise Apartments demand more: they need a road on at least two sides and suffer a happiness penalty if placed next to a Factory without a buffer building. Player reports indicate the optimal residential block is a 3x3 grid with roads on the perimeter, which maximizes the 32-to-48 population range without crowding.
| Residential Block | Population (L1) | Population (L3) | Min Road Touches |
|---|---|---|---|
| Single Suburban House | 4 | 8 | 1 |
| Suburban House Cluster (3x3) | 32 | 48 | 4 (perimeter) |
| Single Mid-rise Apartment | 32 | 48 | 2 |
| Mid-rise + Park Adjacency | 40 | 60 | 2 |
The housing buildings guide details how stacking residential zones without commercial buffers creates a demand crash, so most players intermix a Mall or two into every residential block to keep the population productive. Commercial coverage also lifts happiness, which indirectly boosts tax income.
Commercial Placement
Supermarkets and Malls generate Credits based on nearby residential population. The optimal placement is within 2 tiles of at least 30 residents; beyond that, the income curve flattens. Players who line commercial structures along a single road with residential behind them report the highest Credits-per-tile ratio in the V0.1 beta. A Mall without a Supermarket feeder underperforms, because the Mall's tier-2 multiplier only triggers when the local zone already has basic retail.
Industrial Placement
Factories are the workhorse of the mid-game, converting Steel and Concrete into vehicle components and export goods. They produce noise and pollution, which depresses nearby residential happiness, so the standard pattern is to cluster Factories in a dedicated industrial zone at least 3 tiles from the nearest house. Roads matter more than adjacency for Factories—each Factory needs a connected road segment to actually ship output, and disconnected Factories stall silently. For full layout patterns, the grid layout guide shows worked examples of mid-game city blocks.
Construction Queue Management and Speed Optimization
Your build and conquer construction queue can hold up to three concurrent projects in the V0.1 beta, and the order matters more than most players realize. Construction time stacks, so queuing three 45-minute Nuclear Plants means waiting over two hours before the next project can even start. Smart players rotate: one long project, two short projects, repeat. This keeps the queue fluid and lets you react to resource windfalls.
| Queue Strategy | Avg Wait Per Project | Flexibility | Best For |
|---|---|---|---|
| Three long projects | 90+ min | Low | End-game megabuilds |
| One long + two short | 20 min | High | Mid-game expansion |
| Three short only | 5 min | Very high | Early tutorial phase |
Speed Buffs and Their Sources
Construction speed in the beta comes from three sources: the Town Hall tier, the Construction Office (a support structure unlocked at Tier 3), and the City Center adjacency bonus. The Construction Office alone cuts build time by roughly 25%, while the Town Hall tier scales linearly—Tier 5 cuts total build time by about 40% compared to Tier 1. Stacking all three sources lets you finish a Nuclear Plant in under 30 minutes, which is critical when an event triggers and you need infrastructure fast.
| Speed Source | Build Time Reduction | Stacking Behavior |
|---|---|---|
| Town Hall Tier 5 | 40% | Multiplicative |
| Construction Office | 25% | Multiplicative |
| City Center Adjacency | 10% | Additive with others |
| All Three Combined | ~58% | Best case |
Players who ignore the City Center adjacency bonus often build support structures far from the hub, missing the 10% reduction entirely. The rule of thumb: place the Construction Office within 3 tiles of the City Center, and you automatically inherit the adjacency bonus without micromanaging each project.
Late-Game Infrastructure: Power, Defense, and Megaprojects
Build and conquer infrastructure guide priorities shift sharply once you hit Tier 4. Power becomes the binding constraint—every commercial and industrial structure draws Power, and a brownout stalls production across the entire grid. The Power Plant covers early mid-game demand, but once you start placing multiple Factories the draw exceeds supply, which is when the Nuclear Power Plant becomes mandatory rather than optional.
Defense Structures
Bunkers and Air Raid Sirens form the civil defense layer. They don't generate income, but they reduce casualty rates during attacks, which matters more in the V0.1 beta than players initially expect. Community reports suggest attack frequency rises with city population, so a Tier 4 city with 200+ residents can expect a raid roughly every 20 minutes. Without Bunker coverage, each raid removes 5-10% of the population; with full coverage, that drops to under 1%.
| Defense Structure | Coverage Radius | Casualty Reduction | Power Draw |
|---|---|---|---|
| Bunker | 4 tiles | 60% | 2 |
| Air Raid Siren | 8 tiles | 30% | 4 |
| Bunker + Siren Combo | 8 tiles | 75% | 6 |
The combo coverage matters most during the late-game raids, which spawn multiple waves and target residential blocks first. Players who skip Bunker placement to save Credits typically lose more population than they save, which then triggers a population crash that collapses tax income for several in-game days.
Megaproject Unlocks
The Airport and Skyscraper represent the capstone structures of the V0.1 beta. Both demand Tier 5 Town Hall, four Factories as prerequisites, and a combined Steel+Concrete cost that exceeds 1,500 units. The Airport unlocks trade routes that generate passive Credits, while the Skyscraper provides a population cap boost of 200 residents plus a global happiness multiplier. Players who rush either without first securing a Nuclear Power Plant stall their own economy, because the Skyscraper's 200 residents draw 15 Power each, and the Airport's trade routes require consistent industrial output to function.
City Progression Tips for Build and Conquer Beta
The fastest progression path through the V0.1 beta follows a predictable rhythm: secure Credits income first, then layer industrial production, then pivot to defense and power. Players who try to build everything at once run into resource conflicts, because Steel and Concrete both compete for the same early-game sources. The optimal opening sequence is Town Hall Tier 2 → Supermarket → Mall → Factory chain → Power Plant → Nuclear Plant, which mirrors the broader city tiers progression guide.
Common Mistakes to Avoid
The single most common mistake in the V0.1 beta is ignoring the construction queue and stacking three long projects. The second most common is placing Factories without road access, which silently stalls production and wastes Steel. The third is underestimating power draw—a Tier 4 city with 4 Factories needs the Nuclear Plant to function, but many players delay it thinking the Power Plant is sufficient. The fourth mistake is over-upgrading residential structures before securing commercial income, which creates a population that can't support itself. For a complete building reference, the full building list catalogs every structure in the beta with its verified stats.
Event-Driven Priorities
The V0.1 beta runs periodic events that reward specific building types. Resource boost events favor Factories, population events favor residential, and trade events favor commercial. Players who read the event preview and shift their construction queue accordingly extract 2-3x more value from the same time window. The build and conquer city center buildings also get a temporary boost during civic events, which is a good window to upgrade the City Center without slowing other projects.
Frequently Asked Questions
What are the minimum build and conquer building requirements to unlock the Nuclear Power Plant?
The Nuclear Power Plant requires Town Hall Tier 4, a fully upgraded Power Plant, at least 2 Factories operational, and 300 Steel plus 250 Concrete in reserve. Community data shows most players hit these gates around the 4-hour mark of a fresh save, assuming they follow the standard industrial-first progression path documented in the V0.1 beta notes.
How many structures can the construction queue hold simultaneously?
The construction queue holds up to three concurrent projects in the V0.1 beta. Each slot runs independently, so a long project in slot one doesn't block a short project in slot two. Players who fill all three slots with long projects lose flexibility, which is why the recommended pattern is one long project paired with two short ones to keep the queue reactive.
Where should I place my first Mall for maximum Credits income?
Place the first Mall within 2 tiles of at least 30 residents, ideally on a road with residential blocks on both sides. Community testing shows this configuration generates roughly 400 Credits per in-game hour, compared to 150 Credits when the Mall is placed in an isolated commercial zone. Pairing it with a Supermarket feeder within 3 tiles pushes income closer to 500 Credits per hour.
Do Bunkers and Air Raid Sirens stack their defense bonuses?
Yes, the two structures stack multiplicatively. A Bunker alone reduces casualties by 60%, an Air Raid Siren alone reduces casualties by 30%, and placing both within their overlapping coverage radius reduces casualties by roughly 75%. The combo is most effective in residential-dense blocks where the population at risk is highest, so prioritize Bunker-Siren pairs in your densest housing zones first.
What happens if my city runs out of Power?
A Power deficit in the V0.1 beta stalls all industrial and commercial production, and residential zones begin losing happiness at a rate of 5% per in-game hour. Factories stop producing Steel and Concrete, Malls and Supermarkets stop generating Credits, and the city enters a downward spiral that takes roughly 30 minutes to recover from even after Power is restored. The Nuclear Power Plant is the standard solution once you exceed 40 Power draw, because it produces 50 Power and offsets the deficit of multiple Factories simultaneously.