
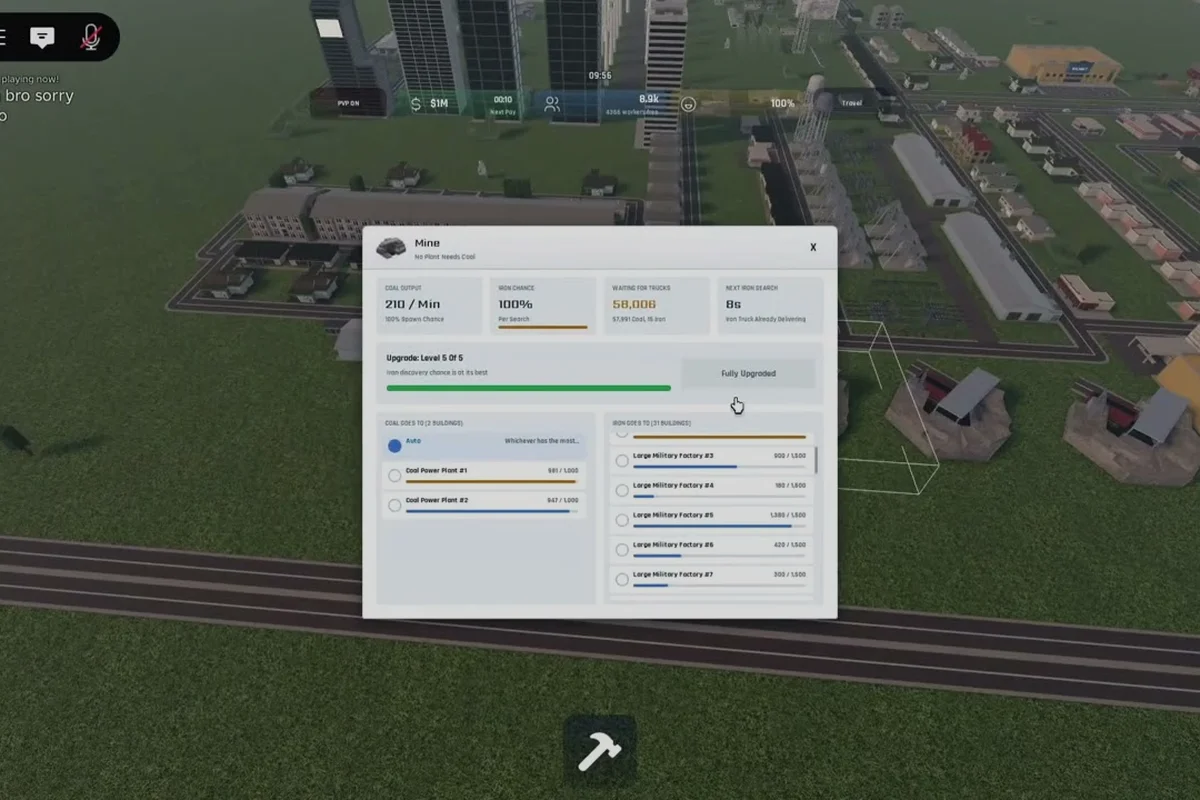
Industrial resources sit at the center of every late-game push in Build and Conquer, and the V0.1 beta has reshaped how iron, steel, and fuel flow from raw nodes into functioning war economies. Whether you are expanding a tank column or trying to keep a mechanized frontline supplied, the gap between a stalled base and a roaring one is almost always an industrial pipeline problem. This guide compares the three pillar materials by yield, breaks down the steel chain after its recent rework, and gives you a practical set of routes and efficiency tweaks to keep every factory humming.
According to the Build and Conquer gameplay resource guide, industrial resources are gathered by constructing dedicated production structures on the map, and players must continually expand their territory to secure deposits before rival factions can contest them.
The Industrial Triangle: Iron, Steel, and Fuel at a Glance
The current Build and Conquer economy runs on three industrial resources that feed every advanced structure and vehicle: Iron Ore, Steel, and Fuel. Iron is the base ore gathered for industrial production, Steel is the refined material needed for heavy builds and vehicles, and Fuel is consumed by vehicles and mechanized warfare. Those three together form what experienced players call the industrial triangle, because each one gates the others. A deficit in any leg of the triangle stops the entire pipeline cold, so understanding the ratios is the first step toward stable growth.
The V0.1 beta has changed the way Steel is acquired, so re-check chains against the live build before locking in a base layout. The community has noted, based on community testing, that pre-beta Steel ratios no longer apply, and outdated guides from earlier test branches will mislead your planning. For a primer on the basic node types you should be claiming first, our iron farming fundamentals walkthrough covers the early-game gathering flow.
The table below summarizes the role of each pillar resource, where it comes from, and what it ultimately powers. Think of it as the reference card you should keep open while designing a new district.
| Resource | Source | Primary Consumer | Notes |
|---|---|---|---|
| Iron Ore | Surface and subsurface nodes | Smelters, early construction | Refined into Steel; stockpiled for emergencies |
| Steel | Smelters, advanced foundries | Heavy vehicles, fortifications, late buildings | Recipe changed in V0.1 beta |
| Fuel | Oil derricks, refineries | Tanks, aircraft, mechanized infantry | Stored in tanks with limited capacity |
A healthy base usually holds about a 3:2:1 ratio of Iron to Steel to Fuel in storage, but the ratio tilts hard toward Steel and Fuel once you unlock armored divisions. Planning your industrial expansion around that shift is the difference between smooth tech progression and emergency rationing.
Iron Routes and Gathering Speed
For Build and Conquer players who want to know how to gather iron fast, the answer is layered: map knowledge, refinery placement, and workforce allocation all stack together. Iron nodes are scattered across every biome, but the highest-density clusters tend to sit in rocky and mixed terrain, and the AI tends to contest those regions less in the opening hours of a match. Marking three or four nodes on the map before the first wave of expansion lets you plan road and rail lines that minimize worker travel time.
The most efficient iron gathering setups in the V0.1 beta, according to community testing, share a few traits. Workers are assigned in batches of three per node, which matches the in-game hauling capacity, and nodes are clustered close to a single smelter so that processing begins within seconds of a haul. Players who spread workers across distant nodes in the early game often end up with workers idling in transit, which silently bleeds efficiency.
| Setup | Workers per Node | Smelter Distance | Effective Yield |
|---|---|---|---|
| Solo gatherer | 1 | Any | Low, but flexible |
| Paired gatherer | 2 | Nearby | Solid mid-game |
| Triple cluster | 3 | Adjacent | Highest sustained output |
| Scattered network | 1–2 across many nodes | Far | Lowest per-worker yield |
The triple cluster setup is the ceiling for raw iron extraction in the V0.1 build. If you want a deeper look at route selection and node priority, the raw materials overview pages break down terrain-specific yields and which biomes reward the most aggressive expansion. For most players, the practical takeaway is simple: stop spreading your workforce thin, and group workers around the three richest iron nodes you control before claiming anything else.
Iron Storage and Overflow Control
Iron Ore is the one industrial input that you can stockpile almost indefinitely, so use that buffer to your advantage. Build at least one large storage silo near your smelters, and route overflow from the highest-yield nodes there first. When a steel shortage hits, a deep iron reserve means your smelters can keep running while you troubleshoot the downstream problem. If you let iron sit in worker carts because there is no silo space, you are effectively throwing away free Steel input.
Steel Production: Recipes, Factories, and Ratios
Steel is the most expensive industrial resource in Build and Conquer right now, and the V0.1 beta has tightened its production chain. The base recipe still converts Iron Ore into Steel at a smelter, but a recent update added a new optional refining stage that boosts output at the cost of extra power draw. Community reports suggest the old two-iron-one-steel ratio is no longer accurate, so a deep steel usage guide has to start with the new conversion math.
For practical planning, players are reporting that one smelter running the new high-throughput recipe produces about 1.4 Steel per minute when fully staffed and powered, which is roughly a 30% jump over the old recipe. The cost is significant: a high-throughput smelter draws about 40% more power and requires a second worker slot. If you do not have your power grid under control, that extra draw will tip you into brownouts the moment you add a second smelter, which is why the fuel and electricity guide should be read alongside this one.
| Smelter Setup | Iron Input (per min) | Steel Output (per min) | Power Draw | Workers |
|---|---|---|---|---|
| Legacy recipe | 2.0 | 1.0 | Baseline | 1 |
| New standard | 1.8 | 1.2 | +15% | 1 |
| New high-throughput | 2.0 | 1.4 | +40% | 2 |
The new high-throughput recipe is the clear winner once you have a stable power grid and a worker surplus, which usually happens around the time you unlock medium armor. Until that point, the new standard recipe gives most of the upside without the steep power penalty, and that is the build most players should aim for. The legacy recipe remains useful only in the very early game or in emergency situations where you cannot spare extra workers.
Steel Sink Priority
Once your Steel is flowing, spend it deliberately. Heavy vehicle factories, fortification upgrades, and railgun turrets all draw from the same stockpile, and the temptation to build everything at once is the fastest way to stall your entire war machine. A practical order of investment in the current beta, based on community data, is: light armored recon, then defensive bunkers, then heavy tanks. That order keeps your frontline mobile while you wait for Steel to accumulate, instead of leaving expensive units idle because there is no fuel or crew to field them.
Fuel: Production, Storage, and Efficiency
Fuel is the most fragile of the three industrial resources because it is consumed in real time by every vehicle and aircraft you field. The base sources are oil derricks and refineries, and you can supplement output with captured enemy fuel dumps in some match types. For Build and Conquer players hunting late-game scaling, a deeper look at the fuel production chain explains how refinery stacks interact with storage tanks and where the bottlenecks usually appear.
The single most effective fuel efficiency tip in the V0.1 beta is to keep your mechanized units inside the territory of an active friendly logistics hub. Players report that idle vehicles in logistics range consume about 25% less fuel per minute than vehicles parked in the open, and the bonus stacks if you also have a maintenance depot nearby. If you are pushing armored columns across a large map, drop a logistics hub at every chokepoint rather than chasing fuel trucks back to base.
| Fuel Source | Output (per min) | Requires | Best Use |
|---|---|---|---|
| Oil Derrick | 3.0 | Workers, power | Mid-game baseline |
| Refinery | 6.0 | Crude oil, workers, power | Late-game scaling |
| Captured Depot | 4.5 | Combat presence | Map control plays |
| Trade Hub | Variable | Credits | Emergency top-ups |
The table above is a community-reported snapshot of fuel output in the V0.1 beta. The exact values can shift with patches, so treat them as planning estimates rather than hard guarantees, and re-verify on your live build before committing a base layout.
Fuel Storage and Brownout Avoidance
A second efficiency tip is to build your storage tanks before you need them. Fuel tanks have a fixed capacity, and once they are full, the surplus is wasted if you do not have a place to store it. A useful rule of thumb is to keep at least one tank per two active refineries online, which gives you a comfortable buffer during combat pauses. If you are running close to the edge on storage, demote non-critical vehicles to reserve status so they are not silently burning fuel while parked in your base.
Rare Resources and Late-Game Scaling
Beyond the core industrial triangle, Build and Conquer features a small set of rare resources that unlock high-tier units and structures. These are the materials that decide whether you can field a true late-game war economy or stall out at mid-tier tech. The current beta, according to community testing, exposes rare resources through special nodes, map control objectives, and high-tier trading hubs, and they cannot be produced in a standard smelter or refinery.
The practical way to think about rare resources in Build and Conquer is as a multiplier on top of your existing industrial base. A player with strong iron and fuel pipelines but no rare materials will plateau at medium armor, while a player who secures rare resources early can leap straight into experimental units. Map awareness is the single biggest factor here, because rare nodes are often guarded by elite AI patrols or contested by other players in team matches.
| Rare Resource | Source | Primary Use | Scarcity (Community Report) |
|---|---|---|---|
| Titanium Alloy | Mountain nodes, salvage | Experimental vehicles | High |
| Composite Plating | Trading hubs, missions | Heavy armor upgrades | Medium |
| Advanced Electronics | Captured labs, objectives | Drone and air superiority | Medium |
| Exotic Fuels | Offshore rigs, deep mines | Aircraft and super-heavy tanks | High |
If you are learning how to get materials fast in Build and Conquer, the rare resource tier is where speed matters most because the sources are limited. Pushing early map control is almost always worth the risk, since holding a rare node for a few minutes is the difference between unlocking your experimental unit and falling behind the curve.
Cross-Resource Interactions
The three pillar resources interact more than most players realize. Steel production is gated by iron, but it is also gated by power, which is itself a function of fuel. A fuel shortage that cuts power to your smelters will silently throttle your steel output, even if your iron stockpiles are full. Build and Conquer players chasing rare resources should always check the supporting infrastructure of the node they are about to claim, because a rare titanium node in a fuel-starved corner of the map is more of a liability than an asset until you can power a logistics chain to it.
Industrial Resource Comparison and Build Priorities
Choosing where to invest in Build and Conquer's industrial resources is ultimately a question of what your current war economy needs. A good rule of thumb is to balance all three pillars before pushing any one of them to the next tier, because an imbalance at the base level cascades into brittle production chains. The comparison table below ranks each resource by current usefulness across three common match phases, based on community testing of the V0.1 beta.
| Phase | Top Priority | Second Priority | Third Priority |
|---|---|---|---|
| Opening (0–15 min) | Iron nodes | Oil derrick | Smelter |
| Mid-game (15–40 min) | Steel production | Fuel refineries | Defensive bunkers |
| Late-game (40+ min) | Fuel logistics | Rare resources | Experimental units |
This is a planning template, not a hard rule. If a match drops you next to a rich oil field, flip the mid-game priority order, because the fuel surplus will pay for itself when you start massing armor. Likewise, if you are playing a defensive scenario, Steel jumps to the top of your list because fortifications and bunkers will do more work than another tank column. Adapt the priority order to the map, not the other way around.
Common Pitfalls to Avoid
The fastest way to stall your industrial growth in Build and Conquer is to over-build one resource line while neglecting the others. Players who rush fuel refineries without first securing iron pipelines often end up with idle vehicles and empty iron stockpiles, which is a worse position than they started from. A second pitfall is ignoring power, which is a hidden fourth pillar of the industrial triangle. If your power grid browns out, every smelter and refinery in your base drops to a fraction of its output, and the recovery cost in time is brutal.
A third pitfall is treating rare resources as the primary goal of your base. The path to rare materials runs through the three core pillars first, so a player who skips iron and steel to chase titanium will be locked out of the very factories they need to refine it. Build the core triangle, then expand into the rare tier once your logistics are stable.
Frequently Asked Questions
How do I prioritize iron, steel, and fuel in the V0.1 beta?
In the opening phase, secure iron nodes and one oil derrick before anything else. Once your smelters are running and you have at least one refinery online, push steel production to support heavy armor. Treat fuel logistics as a continuous investment rather than a one-time build, because vehicles consume it in real time.
What changed about steel production in the recent update?
The recent V0.1 update added a new high-throughput steel recipe that increases output by roughly 30% at the cost of extra power and workers. The legacy two-iron-one-steel ratio is no longer accurate, and players are reporting 1.2 to 1.4 steel per minute from optimized smelters. Re-check your base math against the live build before committing to a layout.
Are rare resources worth pursuing early?
Rare resources are worth pursuing once your core iron, steel, and fuel lines are stable. Pushing rare nodes before your industrial triangle is balanced almost always backfires, because you will not have the production capacity to refine or use what you capture. Aim for the rare tier around the mid-game phase, when your refineries are already running and your workforce has slack.
How can I keep fuel from running out during long pushes?
Build logistics hubs at every chokepoint along your armored route, because vehicles in logistics range consume about 25% less fuel. Keep maintenance depots near the front line to avoid wasting fuel on long return trips, and demote non-critical vehicles to reserve status when you are not actively using them. A well-placed logistics network is more valuable than a fifth refinery.
Can I trade industrial resources with allies in team matches?
Yes, trading hubs allow resource exchange between allied bases in the V0.1 beta, and the rates depend on your trade tech level. Use the hub for emergency top-ups rather than as a primary supply line, because every unit of fuel or steel you trade is one less unit your ally can spend on their own war economy. Coordinate trades through voice or text chat to avoid starving your teammate.