
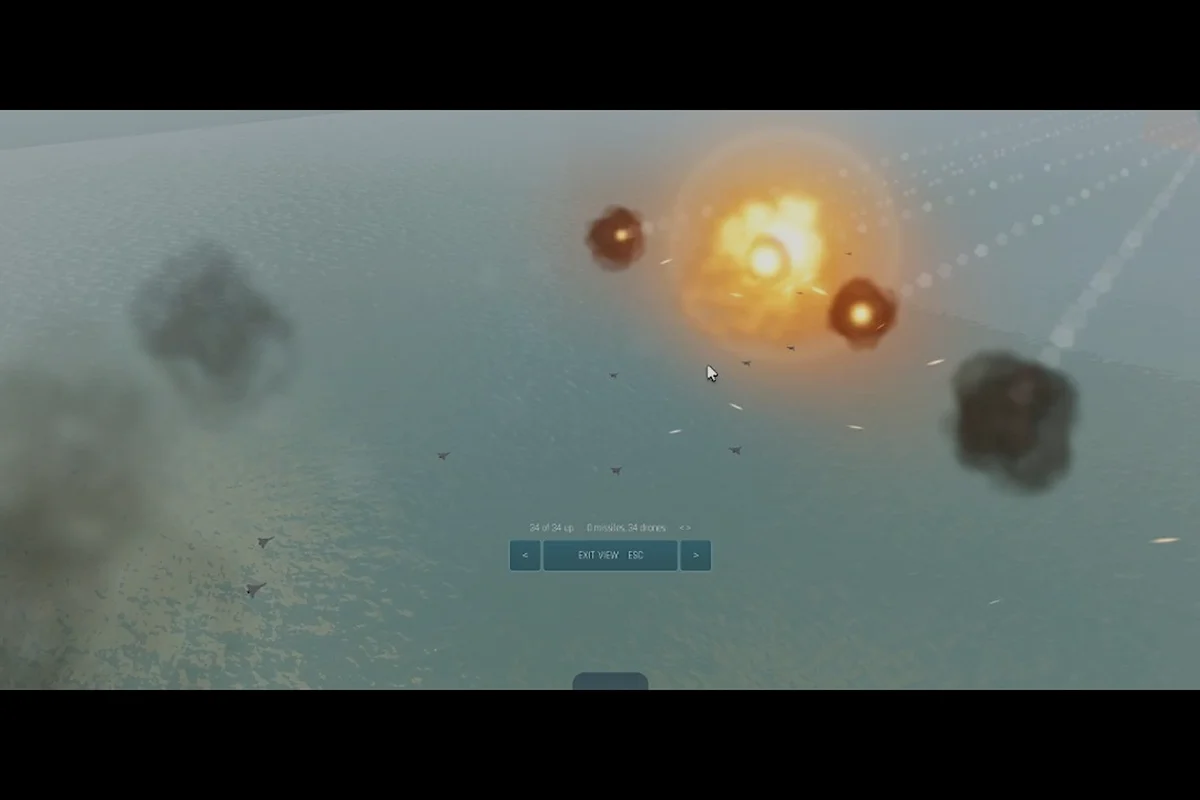
Drone swarms are the fastest way to lose a city in Build and Conquer, and most players do not realize they need a layered defense until the first wave is already over their walls. This guide breaks down exactly how to counter drones with C-RAM fire, interceptor missiles, and smart base layouts that stop swarms before they reach your buildings. The V0.1 beta has made drones a dominant early threat, so understanding the counterplay now will save you from rebuilding your entire economy after a single raid.
Drone Threat Profile and Why C-RAM Matters
Drones in Build and Conquer are a fast air option that has been highlighted in recent updates, and they punish players who only build ground defenses. A single drone wave can bypass walls, ignore terrain, and strike directly at your production buildings, which means your defensive strategy needs to account for vertical threats from the moment you unlock the Military Base. Community footage from the V0.1 beta shows that drone swarms often arrive in groups of 12 to 72 units, and without dedicated anti-air coverage, they will shred your economy in under a minute.
The core counter to this threat is C-RAM fire, which is the primary point-defense system for shooting down incoming drones before they reach your city. C-RAM works best when paired with interceptor missiles, because the two systems cover different engagement ranges. C-RAM handles close-range saturation attacks, while interceptor missiles reach out and thin the swarm before it closes the distance. According to community testing, a single C-RAM emplacement can handle roughly eight to twelve drones per engagement cycle, although exact numbers remain unverified because the beta changed often in October 2026.
| Defense Layer | Engagement Range | Best Target | Weakness |
|---|---|---|---|
| C-RAM Fire | Short to medium | Drone swarms | Overwhelmed by 20+ drones |
| Interceptor Missiles | Medium to long | Single high-value drones | Slow reload |
| Base Layout Spacing | N/A | All air threats | Requires planning |
| Ground AA Units | Medium | Mixed air targets | Vulnerable to tanks |
Understanding this layered approach is essential because no single system will stop a determined drone rush. The most effective players build C-RAM emplacements near their Military Base and resource buildings, then use interceptor missiles to cover the approach lanes where drones tend to cluster. This combination creates overlapping fields of fire that force drones to fly through multiple kill zones before they can deal damage.
Military Unlock Order for Drone Defense
The build and conquer military unlock order determines how quickly you can field anti-drone defenses, and getting this sequence wrong leaves you exposed for several critical minutes. Your first priority should be the Military Base, which serves as the production hub required before any vehicle or missile work can begin. Soldiers unlock at city level 2, but they are primarily a ground unit and will not solve your drone problem on their own.
Once the Military Base is operational, you need to prioritize anti-air research and C-RAM production ahead of offensive units like tanks. Many beginners make the mistake of rushing tanks early, only to discover that a single drone wave can destroy their entire armored column before it leaves the base. The build and conquer military strategy for beginners should always include an early anti-air component, because drones are cheaper and faster to field than tanks in the current beta.
| Unlock Step | Requirement | Purpose | Priority |
|---|---|---|---|
| Military Base | City level 2 | Production hub | Critical |
| Soldiers | City level 2 | Ground defense | Medium |
| C-RAM Emplacement | Military Base | Anti-drone defense | High |
| Interceptor Missiles | Military Base + research | Long-range AA | High |
| Tanks | Military Base + research | Ground offense | Medium |
| HIMARS | Military Base + research | Long-range artillery | Low early |
The build and conquer army size limit also affects how many defensive units you can field, so you cannot simply spam C-RAM emplacements and ignore everything else. Community reports indicate that eight guns make one squadron, and this conversion rate applies to both offensive and defensive formations. You need to balance your army size between anti-air coverage, ground defense, and offensive units, which means every C-RAM emplacement you build reduces the number of tanks or soldiers you can deploy elsewhere. Planning your production sequence around this trade-off is easier when you know exactly which units become available at each stage, so consult our Build And Conquer Unit Unlock Order to time your C-RAM investments without stalling your ground push.
Base Layout Strategies That Shut Down Swarms
Base layout is the most underrated part of learning how to counter drones, because a well-spaced city forces drones to fly through multiple defensive layers before reaching anything valuable. The key principle is spacing: if your Military Base, resource buildings, and C-RAM emplacements are all clustered together, a single drone wave can hit everything at once. Spreading your buildings out creates travel time, which gives your interceptors more chances to shoot down incoming threats.
Defensive Spacing and Kill Zones
The most effective base layouts create kill zones between your outer perimeter and your core buildings. Place C-RAM emplacements at the corners of your city, then position interceptor missile launchers slightly behind them to cover the gaps. This arrangement forces drones to fly through overlapping fields of fire, and each layer of defense gets a chance to engage before the swarm reaches your economy. Players who use this spacing strategy report significantly fewer successful drone strikes, even against 72-drone swarms.
Building Placement Priorities
Your Military Base should sit in the center of your city, with resource buildings arranged in a ring around it. C-RAM emplacements go on the outer edge of this ring, while interceptor missiles sit just inside the C-RAM line. This creates a defense-in-depth layout where drones must penetrate multiple layers before reaching anything important. The build and conquer combat tips that veteran players share almost always emphasize spacing over raw firepower, because a spread-out base survives longer even with fewer defensive units.
| Building | Recommended Position | Reason |
|---|---|---|
| Military Base | City center | Protect production |
| Resource Buildings | Ring around center | Spread out targets |
| C-RAM Emplacements | Outer perimeter | First line of defense |
| Interceptor Missiles | Inside C-RAM line | Second engagement layer |
| Tank Depots | Rear of base | Shield from air strikes |
How to Counter Tanks Alongside Drone Defense
While drones are the primary threat, you cannot ignore ground units entirely, because a combined arms attack will overwhelm a defense that only focuses on air. The build and conquer how to counter tanks question is just as important as the drone question, and the answer involves positioning your anti-air defenses so they do not become easy targets for ground forces. Tanks are the core ground force for pushing enemy territory, and they will target your C-RAM emplacements if they get close enough.
The solution is to place your C-RAM and interceptor missiles behind a screen of soldiers or tank traps, which buys time for your anti-air systems to deal with drones before ground units arrive. HIMARS units serve as long-range artillery used to probe and punish enemy movement, and they can soften up tank columns before they reach your defensive line. This combined approach means your base can handle both air and ground threats without sacrificing one for the other.
Coordinated Defense Priorities
When facing a mixed attack, prioritize drones first because they deal damage faster and are harder to stop once they are over your buildings. Tanks move slower and can be kited or delayed with terrain, but drones will be on top of your economy within seconds of entering your airspace. Once the drone wave is neutralized, your ground defenses can focus on the tank column without worrying about air strikes hitting them from above.
Advanced Combat Tips for Drone Swarm Scenarios
The build and conquer combat tips that separate good players from great ones all revolve around timing and resource management. You need to know exactly when to activate your interceptor missiles, because firing them too early wastes the salvo on the leading edge of the swarm, while firing too late lets drones slip through to your buildings. The ideal timing is when the swarm is at medium range and still clustered together, which maximizes the number of drones each missile can hit.
Another advanced tip is to keep a reserve of C-RAM firepower for the second wave. Many drone rushes come in multiple waves, and if you spend all your defensive ammo on the first wave, the second wave will hit you with no resistance. Community footage of how to counter drones shows that players who hold back one-third of their C-RAM fire for follow-up waves survive much longer than those who dump everything at the first sign of drones.
| Scenario | Recommended Response | Common Mistake |
|---|---|---|
| Single drone wave | Full C-RAM engagement | Overcommitting interceptors |
| Multi-wave rush | Hold 1/3 C-RAM reserve | Dumping all ammo on wave 1 |
| Mixed air + ground | Drones first, then tanks | Splitting fire evenly |
| 72-drone swarm | Layered defense + spacing | Relying on one AA system |
| Early game rush | Rush C-RAM before tanks | Building tanks first |
The build and conquer military strategy for beginners should emphasize that drone defense is not a one-time investment but an ongoing commitment. You need to keep your C-RAM emplacements repaired, your interceptor missiles reloaded, and your base layout adjusted as your city grows. Players who treat anti-air as a set-and-forget system will eventually get overwhelmed by larger swarms, because the beta has shown that drone waves scale up as the game progresses.
Frequently Asked Questions
How do I unlock C-RAM in Build and Conquer?
You need to build the Military Base first, which is the production hub required before any vehicle or missile work. Once the Military Base is operational, C-RAM emplacements become available as a defensive structure. Soldiers unlock at city level 2, but C-RAM requires the Military Base to be functional before you can produce it.
What is the best early game defense against drone rushes?
The best early defense is rushing C-RAM emplacements before investing in tanks or offensive units. Drones are cheap and fast to field, so you need anti-air coverage from the moment your Military Base is online. Spacing your buildings out also helps, because it gives your C-RAM more time to engage incoming swarms.
How many C-RAM emplacements do I need?
Community reports indicate that eight guns make one squadron, but the exact number of C-RAM emplacements you need depends on your base size and the size of incoming swarms. A small base can survive with two to three well-placed emplacements, while larger cities facing 72-drone swarms need at least five to six spread across the perimeter.
Can drones destroy tanks in Build and Conquer?
Yes, drones can destroy tanks if the tanks are caught without anti-air support. Tanks are the core ground force for pushing enemy territory, but they are vulnerable to air attacks. This is why you should always pair tank columns with C-RAM coverage or interceptor missile support when advancing into enemy territory.
Does the army size limit affect defensive units?
Yes, the build and conquer army size limit applies to both offensive and defensive units. Every C-RAM emplacement or interceptor missile launcher you build counts against your total army size, which means you need to balance anti-air coverage with ground defense and offensive units. Planning your army composition around this limit is essential for long-term survival.
Mastering drone defense in Build and Conquer comes down to three things: rushing C-RAM and interceptors in your unlock order, spacing your base to create overlapping kill zones, and holding reserves for multi-wave attacks. The V0.1 beta has made drones the defining early threat, and players who build layered anti-air defenses will consistently outperform those who rely on ground units alone. Check the official Build and Conquer Roblox page for the latest beta updates, and apply these spacing and timing principles to keep your city safe from the swarm.