
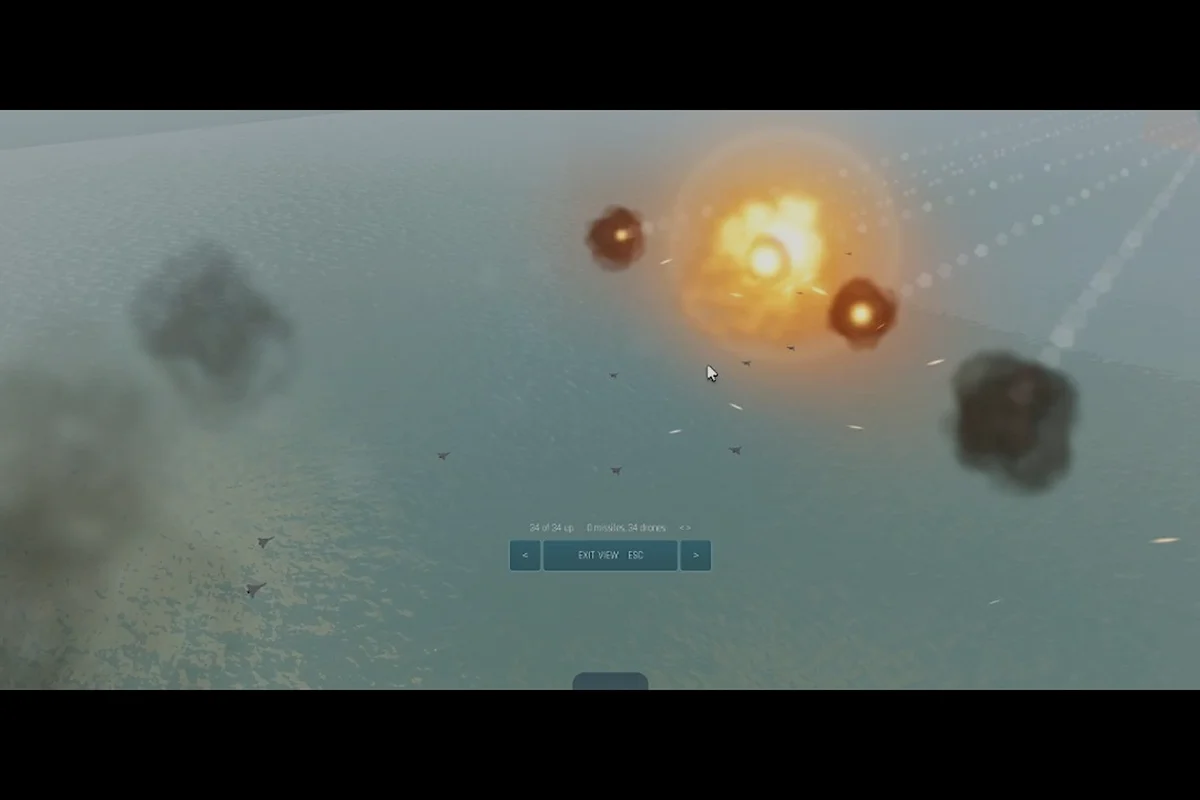
Drones have become the fastest way to punish exposed enemy positions in Build and Conquer, but many players still treat them as a late-game luxury instead of a core military tool. This Build and Conquer drone guide breaks down how air units interact with HIMARS artillery, ground vehicles, and tunnel-based troop deployment so you can build an army composition that actually survives contact. The V0.1 beta rewards players who combine fast air strikes with deliberate ground pushes, and understanding that synergy is what separates a frustrating loss from a clean territorial expansion.
Understanding the Drone Role in Military Composition
Drones occupy a specific tactical niche in Build and Conquer that no other unit fills. While tanks form the core ground force for pushing enemy territory, drones provide the rapid-response air option that recent updates have highlighted as a counter to slow-moving armor columns. A proper build and conquer drone guide starts with recognizing that drones are not a replacement for ground units but a force multiplier that exploits gaps in enemy positioning.
The Military Base serves as the production hub required before any vehicle or missile work can begin. Without this structure, you cannot field drones, tanks, or HIMARS systems at all. Soldiers unlock at city level 2, and community reports indicate that eight guns make one squadron, though the developer has not published official unit costs. This production hierarchy means your early game must prioritize city leveling and military infrastructure before air power becomes viable.
| Unit Type | Primary Role | Unlock Requirement | Community-Reported Notes |
|---|---|---|---|
| Soldiers | Basic infantry for early pushes | City level 2 | Foundation unit, cheap and expendable |
| Tanks | Core ground force for territory control | Military Base required | Best for sustained pushes into enemy land |
| Drones | Fast air strikes and harassment | Military Base required | Highlighted in recent updates, fast response |
| HIMARS | Long-range artillery probing | Military Base required | Used to punish enemy movement at distance |
The key insight from community testing is that drones work best when they are already in the air before your ground forces commit. Because drones move faster than any ground vehicle, they can force an opponent to reposition anti-air defenses while your tanks close the distance. That timing pressure is what makes the air-ground combination so effective in the current beta.
How to Get Drones and Set Up Air Production
Players frequently ask how to get drones working efficiently, and the answer involves more than just unlocking the unit. The production pipeline requires a Military Base first, then the appropriate research or build queue for air units. Community footage from the V0.1 beta shows that drone production becomes available after the military infrastructure is established, though exact costs remain unverified as of October 2026.
Production Prerequisites
Before you can field a single drone, you need to complete several infrastructure steps. The Military Base is the non-negotiable first structure because it gates all vehicle and missile work. After that, you need enough economic output to sustain continuous production, since drones tend to be lost quickly when used aggressively. Players report that a stable army composition requires balancing drone production with tank and soldier queues rather than spamming a single unit type.
Drone Deployment Timing
The most common mistake in any build and conquer drone guide is deploying air units too early or too late. Drones sent in before ground forces are ready get shot down without achieving anything. Drones held back until the enemy has already fortified become useless. The effective window is narrow: launch drones as your tanks begin their advance, using the air units to force enemy anti-air to reveal itself.
| Deployment Phase | Drone Role | Ground Unit Role | Expected Outcome |
|---|---|---|---|
| Opening | Scout enemy positions | Hold defensive line | Identify weak points without losses |
| Mid-push | Strike exposed artillery | Advance on weakened flank | Force enemy to split attention |
| Late engagement | Harass retreating units | Secure captured territory | Maximize enemy losses during retreat |
| Defense | Counter enemy drones | Hold key chokepoints | Deny air superiority to attacker |
Because the beta changed often during October 2026, treat any specific production number not listed in verified sources as community-reported rather than confirmed. The reliable path is to build the Military Base, unlock soldiers at city level 2, then expand into vehicle and drone production as your economy stabilizes.
HIMARS Artillery and the Long-Range Punish Game
The HIMARS system functions as the long-range artillery option that probes and punishes enemy movement before your main force engages. A dedicated build and conquer himars guide would emphasize that this unit is not about raw damage output but about forcing the enemy to make bad decisions. When HIMARS rounds start landing on a resource node or production building, the opponent must either reposition or accept continued losses.
Artillery Positioning and Tunnel Support
HIMARS units work best when they can fire from positions that are difficult to counterattack. This is where the tunnel system becomes critical. Players who master how to deploy troops through tunnels can shift artillery between fronts without exposing them to enemy drones or tank rushes. The tunnel network effectively extends your artillery's threat range while keeping the launchers safe.
| Artillery Tactic | Tunnel Usage | Risk Level | Community-Reported Effectiveness |
|---|---|---|---|
| Static bombardment | None, exposed position | High | Punishes stationary targets but vulnerable to counter-battery |
| Shoot-and-scoot | Tunnel to fallback position | Low | Fires, then relocates before enemy responds |
| Multi-front pressure | Tunnels between two fronts | Medium | Forces enemy to defend multiple angles simultaneously |
| Bait and ambush | Tunnel to pre-positioned kill zone | Medium | Draws enemy into prepared drone and tank response |
The eight guns per squadron conversion is community-reported and may change as the beta evolves. What remains consistent is that HIMARS forces the enemy to move, and moving units are easier targets for your drones. That interaction between artillery pressure and air strikes forms the backbone of an aggressive military strategy.
Vehicle Guide and Army Composition Fundamentals
Any serious build and conquer vehicle guide must address the tension between tanks, drones, and HIMARS within a single army composition. The verified briefing for the V0.1 beta identifies tanks as the core ground force for pushing enemy territory, which means your vehicle mix should always include a solid tank contingent. Drones supplement that push, and HIMARS softens targets before the tanks arrive.
Balanced Composition Framework
Community reports consistently show that balanced compositions outperform mono-unit spam. A force of only tanks gets kited by drones. A force of only drones cannot hold territory. A force of only HIMARS gets overrun once the enemy closes distance. The effective build and conquer army composition layers all three unit types so each covers the weaknesses of the others.
| Composition Type | Tank Ratio | Drone Ratio | HIMARS Ratio | Best Use Case |
|---|---|---|---|---|
| Aggressive push | High | Medium | Low | Rapid territorial expansion |
| Defensive hold | Medium | Low | High | Punishing enemy advances from range |
| Harassment | Low | High | Medium | Disrupting enemy economy and production |
| Balanced | Medium | Medium | Medium | Flexible response to unknown threats |
The troop deployment order matters as much as the composition itself. Sending drones first reveals enemy positions, HIMARS then forces movement, and tanks finally secure the ground. Reversing that order wastes the artillery's range advantage and exposes your air units to unnecessary losses.
Deploying Troops Through Tunnels for Strategic Mobility
The tunnel system is the most underutilized mobility tool in Build and Conquer. Players who understand how to deploy troops through tunnels gain a strategic advantage that pure surface movement cannot match. Tunnels allow you to shift entire armies between fronts without exposing them to drone harassment or artillery fire, which makes them essential for any multi-front strategy—especially once you pair that subterranean mobility with the aerial reconnaissance and strike coverage covered in our Build And Conquer How To Unlock Drones guide.
Tunnel Network Planning
Effective tunnel use starts with placement. Tunnels should connect your production hubs to forward positions, allowing fresh units to reach the front quickly. They should also connect multiple fronts so you can rapidly reinforce whichever side is under pressure. Community footage from the V0.1 beta shows that well-planned tunnel networks let players defend two distant points with a single army.
| Tunnel Configuration | Strategic Benefit | Common Mistake | Community-Reported Impact |
|---|---|---|---|
| Hub to front | Fast reinforcement | Placing hub too close to enemy | Reduces response time significantly |
| Front to front | Rapid army relocation | Neglecting defense at both ends | Enables multi-front pressure |
| Artillery fallback | Safe HIMARS repositioning | No secondary exit | Keeps artillery alive longer |
| Ambush network | Hidden strike routes | Overbuilding beyond economy | Creates surprise attack options |
Because the beta changed often in October 2026, cross-check any tunnel-related numeric claim against verified sources before relying on it. The core principle remains stable: tunnels multiply the effective reach of your army by removing travel time from the equation.
Coordinating Tunnel Moves with Air Strikes
The most devastating combination in the current beta involves using tunnels to reposition ground forces while drones strike from above. When your opponent commits to defending against a drone attack, your tunneled tanks emerge on an unexpected flank. That split-second decision pressure often causes mistakes that a coordinated force can exploit.
Frequently Asked Questions
How do I unlock drones in Build and Conquer?
You need to construct a Military Base first, which serves as the production hub for all vehicle and missile work. Soldiers unlock at city level 2, and drones become available once the military infrastructure is established. Exact production costs remain unpublished by the developer as of October 2026.
What is the best army composition for the V0.1 beta?
A balanced mix of tanks, drones, and HIMARS works best because each unit covers the weaknesses of the others. Tanks hold territory, drones provide fast air response, and HIMARS punishes enemy movement from long range. Community reports consistently show that mono-unit spam loses to layered compositions.
How do tunnels help with troop deployment?
Tunnels let you move troops between fronts without exposing them to enemy fire. This is especially valuable for relocating HIMARS artillery after firing, since the launchers can retreat through tunnels before counter-battery fire arrives. Well-planned tunnel networks multiply your army's effective reach.
Are drones effective against tanks?
Drones work best as a harassment tool against tanks rather than a direct counter. Because drones move faster than ground vehicles, they can force tank columns to reposition or reveal anti-air defenses. The real value comes from combining drone pressure with HIMARS strikes and a tank push of your own.
Where can I find verified Build and Conquer information?
The official Build and Conquer Roblox page lists the developer as The Slop Company with up to 8 players per server. The The Slop Company Roblox group serves as the only official channel for beta announcements, and community footage covers the V0.1 beta specifically.